Christian Heilmann

Posts Tagged ‘api’

Is it time to take mashups and use them to solve real issues?

Monday, June 2nd, 2008

This is my presentation given at the BarCamp4 at Gcap in London, talking about my recent move to start doing more mashups again and what lead to it.

My mashup and accessibility fatigue

In a nutshell I have to say that I was getting tired of ethical hacking and mashups. Far too many people just create mashups for the sake of putting some information together or prove a technical concept but I just couldn’t see the use of what was produced. We create a lot of ideas, prototypes, proofs of concept, celebrate them as being cool and then never re-visit or turn them into projects.

I was also bored with the accessibility movement on the web. Instead of concentrating on solutions for people we ran in circles demanding technical solutions or implementation of standards that don’t make much sense in the real world. It was much more important to be compliant with something than to really deliver for the people who needed us to remove barriers for them. It is all about demanding things to be done rather than doing them. And I felt that I wasted my time trying to get something done in this surrounding.

Boost : The social innovation camp

That changed drastically when I was a judge at the Social Innovation Camp. The concept of the camp was brilliant: allow people who have real world problems to draft up an idea how modern technology like web sites and social networks could help solving or at least making these problems smaller. The entries were massive and ranged from simple things like sharing sites (rent a drill instead of buying one and let it collect dust) to personal growth/learning monitoring systems.

Boost : Enabled by design

The project that stood out the most for me was Enabled by design which is a showcase site for people with disabilities showing the world what problems they have fulfilling certain day to day tasks (say cutting food) and what tools are available to overcome these problems.

The second idea of enabled by design is that it should become a place where product designers and production companies could get information about what products are needed and then can start designing and producing those in more appealing ways. Most assistive technology and products are ugly, and they don’t have to be – actually that makes the person who just had to start to use them to fulfill tasks previously easy for them feel even worse. People get as excited about product design as we get about APIs and mashing things up – both of these great amounts of energies could be targeted to solve real-life needs of real people.

Boost – Ability 2.0 conference and accessihacking YouTube

With my mindset of giving the accessibility world a swift kick up the backside I gave my talk Fencing-in the habitat at the Accessibility2.0 conference pointing out the useless energy we waste on technical solutions built to satisfy ourselves rather than making a difference for the end user.

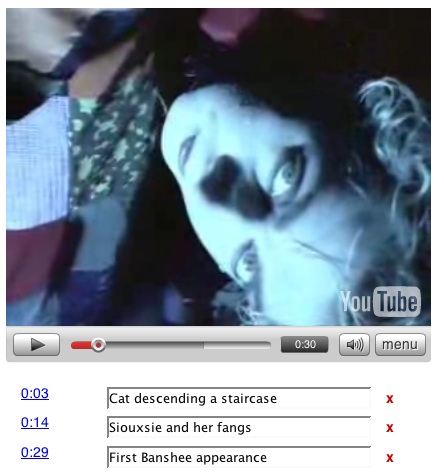
One of the other talks that day was Antonia Hyde talking about the issues users with learning disabilities are facing on the web, especially in regards to online video. Well, I thought to myself, as YouTube has an API, and I’ve been playing around with it already, why not have a go at an accessible YouTube player. I’ve created a prototype and sent that out to Antonia and some other accessibility contacts and the feedback was awesome.

What confused me most was that I got feedback from schools and blind people thanking me for the player and finally being able to use YouTube. I liked that a lot – realizing that I helped far more people than I thought by tackling something I hadn’t tried before – thinking in detail about the needs of people with learning disabilities!

The player is going strong and I am now writing documentation for the 2.0 version which will feature a search, playlists created by bookmarking in del.icio.us and more features like zoom.

Question: What about the future?

Am I weird (don’t answer that out of context) or is there something in there? Are there more developers out there who are stuck in a rut mashing up data without ever really making a difference with it, or do I care to go there just because I have so much exposure to this world?

I am imagining (and already started) planning an event for exactly that – social and accessible hacking of currently used internet services. We could have a hackday weekend with spokespeople from different agencies explaining the issues that people with disabilities have to use for example flickr, youtube, last FM and so on and a bunch of hackers to have a go at building alternative interfaces based on the APIs of these companies. I would also like to get people from these companies there to learn about the hacks and maybe take on some of the learnings and put them in the live systems.

The question is: would that be something you want?

Example of an unobtrusive, lazy-loading badge using the Twitter API

Friday, April 11th, 2008

Following questions I had about my talk at Highland Fling about badges for distribution and a twitter nagging by Tantek about the official twitter badge I thought I’d have a go at creating a twitter badge following some of the best practices I mentioned in my talk. Here’s the result.

The markup

Instead of HTML containers that will be seeded with real data when JavaScript is available and pointless when it isn’t, I wanted to build on top of HTML that makes sense without scripting and get all the info my script needs from there.


Example of a unobtrusive, lazy loading twitterbadge


In order to customise the badge, I allow for CSS classes with information to be added to the main container:


Example of a unobtrusive, lazy loading twitterbadge


They mean the following:

  • amount-n defines the amount of tweets to be displayed with n being an integer
  • skin-name defines the skin you want to use (for now this is grey and blue)
  • userinfo defines if the user’s avatar, name and location should be displayed.

The script

Here’s the full script and we’ll go through the bits one by one.

twitterbadge = function(){
var config = {
countDefault:5,
badgeID:’twitterbadge’,
userID:’twitterbadgeuser’,
tweetsID:’twitterbadgetweets’,
userinfo:’userinfo’,
stylesmatch:/skin-(w+)/,
amountmatch:/amount-(d+)/,
styles:{
‘grey’:’twitterbadge.css’,
‘blue’:’twitterbadgeblue.css’
}

};
var badge = document.getElementById(config.badgeID);
if(badge){
var link = badge.getElementsByTagName(‘a’)[0];
if(link){
var classdata = badge.className;
var head = document.getElementsByTagName(‘head’)[0];
var amount = config.amountmatch.exec(classdata);
var amount = amount ? amount[1] : config.countDefault;
var skin = config.stylesmatch.exec(classdata);
if(skin && skin[1]){
var style = document.createElement(‘link’);
style.setAttribute(‘rel’,’stylesheet’);
style.setAttribute(‘type’,’text/css’);
style.setAttribute(‘href’,config.styles[skin[1]]);
head.insertBefore(style,head.firstChild);
}

var name = link.href.split(‘/’);
var resturl = ‘http://twitter.com/statuses/user_timeline/’ +
name[name.length-1] + ‘.json?callback=’ +
‘twitterbadge.show&count=’ + amount;
var script = document.createElement(‘script’);
script.src = resturl;
script.type = ‘text/javascript’;
function show(result){
if(classdata.indexOf(config.userinfo) != -1){
var user = document.createElement(‘p’);
user.id = config.userID;
var img = document.createElement(‘img’);
img.src = result[0].user.profile_image_url;
img.alt = result[0].user.name;
user.appendChild(img);
var ul = document.createElement(‘ul’);
var data = [‘screen_name’,’name’,’location’];
for(var i=0;data[i];i++){
if(result[0].user[data[i]]){
var li = document.createElement(‘li’);
li.appendChild(document.createTextNode(result[0].user[data[i]]));
ul.appendChild(li);
}

}
user.appendChild(ul);
badge.appendChild(user);
}

var tweets = document.createElement(‘ul’);
tweets.id = config.tweetsID;
for(var i=0,j=result.length;i var username = result[i].user.screen_name;
var li = document.createElement(‘li’);
var span = document.createElement(‘span’);
span.innerHTML = result[i].text+’ ‘;
li.appendChild(span);
var link = document.createElement(‘a’);
link.setAttribute(‘href’,’http://twitter.com/’ + username +
‘/statuses/’+result[i].id);
link.appendChild(document.createTextNode(relative_time(result[i].created_at)));
li.appendChild(link);
tweets.appendChild(li);
}

badge.appendChild(tweets);
}

function relative_time(time_value) {
var values = time_value.split(” “);
time_value = values[1] + ” ” + values[2] + “, ” + values[5] + ” ” + values[3];
var parsed_date = Date.parse(time_value);
var relative_to = (arguments.length > 1) ? arguments[1] : new Date();
var delta = parseInt((relative_to.getTime() – parsed_date) / 1000);
delta = delta + (relative_to.getTimezoneOffset() * 60);
if (delta < 60) {
return ‘less than a minute ago’;
} else if(delta < 120) {
return ‘about a minute ago’;
} else if(delta < (60*60)) {
return (parseInt(delta / 60)).toString() + ’ minutes ago’;
} else if(delta < (120*60)) {
return ‘about an hour ago’;
} else if(delta < (24*60*60)) {
return ‘about ’ + (parseInt(delta / 3600)).toString() + ’ hours ago’;
} else if(delta < (48*60*60)) {
return ‘1 day ago’;
} else {
return (parseInt(delta / 86400)).toString() + ’ days ago’;
}

}
}

}
return {
show:show,
init:function(){
head.appendChild(script);
}

};
}();
twitterbadge.init();

I am using the revealing module pattern to keep code short and avoid global callback methods. However, there is a slight Opera oddity with generated script nodes in module patterns so we have to deviate from the norm there with an extra init() method call after the main module.

The first thing I thought of providing is a configuration object for the script. This makes it easy to change settings of it without having to hunt through the whole script and is just a nice service for the implementer:


twitterbadge = function(){
var config = {
countDefault:5,
badgeID:’twitterbadge’,
userID:’twitterbadgeuser’,
tweetsID:’twitterbadgetweets’,
stylesmatch:/skin-(w+)/,
amountmatch:/amount-(d+)/,
styles:{
‘grey’:’twitterbadge.css’,
‘blue’:’twitterbadgeblue.css’
}

};

Here we have all the IDs in use, the style names and the corresponding file names and the regular expressions to get the data from the CSS class name. All of the IDs and classes are hooks to define your own skins. There is also a countDefault variable to define how many items should be shown when the amount class is not set.


var badge = document.getElementById(config.badgeID);
if(badge){
var link = badge.getElementsByTagName(‘a’)[0];
if(link){

I test for the badge and that it contains a link as this is where we will get all our configuration data from.


var classdata = badge.className;
var head = document.getElementsByTagName(‘head’)[0];
var amount = config.amountmatch.exec(classdata);
var amount = amount ? amount[1] : config.countDefault;
var skin = config.stylesmatch.exec(classdata);
if(skin && skin[1]){
var style = document.createElement(‘link’);
style.setAttribute(‘rel’,’stylesheet’);
style.setAttribute(‘type’,’text/css’);
style.setAttribute(‘href’,config.styles[skin[1]]);
head.insertBefore(style,head.firstChild);
}

Then I am ready to read the information from the class. I set a shortcut to the document head and read the amount of tweets to be displayed. If there is no amount-n class set I fall back to the default.

Next is the skin, I check if the class was set and if that is the case I create a new link element pointing to the right skin. I get the href from the configuration styles object.

Notice that I use insertBefore() to add the style to the head of the document and not appendChild(). This ensures to a degree that the skin css file will not override settings that might be in other stylesheets. The last included style sheet rules them all.


var name = link.href.split(‘/’);
var resturl = ‘http://twitter.com/statuses/user_timeline/’ +
name[name.length-1] + ‘.json?callback=’ +
‘twitterbadge.show&count=’ + amount;
var script = document.createElement(‘script’);
script.src = resturl;
script.type = ‘text/javascript’;

Now it is time to find the user name (by splitting the href attribute of the link) and assemble the REST url to get the twitter data. Normally I would have added the new script node to the head directly aftwerwards, but Opera doesn’t like this.


function show(result){
if(classdata.indexOf(config.userinfo) != -1){
var user = document.createElement(‘p’);
user.id = config.userID;
var img = document.createElement(‘img’);
img.src = result[0].user.profile_image_url;
img.alt = result[0].user.name;
user.appendChild(img);
var ul = document.createElement(‘ul’);
var data = [‘screen_name’,’name’,’location’];
for(var i=0;data[i];i++){
if(result[0].user[data[i]]){
var li = document.createElement(‘li’);
li.appendChild(document.createTextNode(result[0].user[data[i]]));
ul.appendChild(li);
}

}
user.appendChild(ul);
badge.appendChild(user);
}

Now it is time to start the core functionality: the show method that will be invoked by the twitter REST API callback. I check if the userinfo has been set and create the markup accordingly. Nothing amazing here.


var tweets = document.createElement(‘ul’);
tweets.id = config.tweetsID;
for(var i=0,j=result.length;i var username = result[i].user.screen_name;
var li = document.createElement(‘li’);
var span = document.createElement(‘span’);
span.innerHTML = result[i].text+’ ‘;
li.appendChild(span);
var link = document.createElement(‘a’);
link.setAttribute(‘href’,’http://twitter.com/’ + username +
‘/statuses/’+result[i].id);
link.appendChild(document.createTextNode(relative_time(result[i].created_at)));
li.appendChild(link);
tweets.appendChild(li);
}

badge.appendChild(tweets);
}

Next I get the tweets information, assemble a list and add it to the badge.


function relative_time(time_value) {
[...]
}

}
}

return {
show:show,
init:function(){
head.appendChild(script);
}

};
}();
twitterbadge.init();

The relative_time method is actually taken from the original twitter badge and calculates how old the tweets are. I end the module with a return statement that defines the public methods (in this case only show) and add the script node to call the REST API in an init method. This is only necessary to fix the Opera issue.

Download and Example

You can download the twitter badge and see it in action.

Making twitter multilingual with a hack of the Google Translation API

Monday, March 31st, 2008

After helping to fix the Yahoo search result pages with the correct language attributes to make them accessible for screen reader users I was wondering how this could be done with user generated content. The easiest option of course would be to ask the user to provide the right language in the profile, but if you are bilingual like me you actually write in different languages. The other option would be to offer me as the user to pick the language when I type it, which is annoying.

I then stumbled across Google’s Ajax Translation API and thought it should be very easy to marry it with for example the JSON output of the twitter API to add the correct lang attributes on the fly.

Alas, this was not as easy as I thought. On the surface it is very easy to use Google’s API to tell me what language a certain text is likely to be:


var text = “¿Dónde está el baño?”;
google.language.detect(text, function(result) {
if (!result.error) {
var language = ‘unknown’;
for (l in google.language.Languages) {
if (google.language.Languages[l] result.language) {
language = l;
break;
}

}
var container = document.getElementById("detection");
container.innerHTML = text + " is: " + language + "";
}

});

However, if you want to use this in a loop you are out of luck. The google.language.detect method fires off an internal XHR call and the result set only gives you an error code, the confidence level, a isReliable boolean and the language code. This is a lot but there is no way to tell the function that gets the results which text was analyzed. It would be great if the API repeated the text or at least allowed you to set a unique ID for the current XHR request.

As Ajax requests return in random order, there is no way of telling which result works for which text, so I was stuck.

Enter Firebug. Analyzing the requests going through I realized there is a REST URL being called by the internal methods of google.language. In the case of translation this is:


http://www.google.com/uds/GlangDetect?callback={CALLBACK_METHOD}&context={NUMBER}&q={URL_ENCODED_TEXT}&key=notsupplied&v=1.0

You can use the number and an own callback method to create SCRIPT nodes in the document getting these results back. The return call is:


CALLBACK_METHOD(‘NUMBER’,{“language” : “es”,”isReliable” : true,”confidence” : 0.24716422},200,null,200)

However, as I am already using PHP to pull information from another service, I ended up using curl for the whole proof of concept to make twitter speak in natural language:


    // curl the twitter feed
    $url = ‘http://twitter.com/statuses/public_timeline.rss’;
    $ch = curl_init();
    curl_setopt($ch, CURLOPT_URL, $url);
    curl_setopt($ch, CURLOPT_RETURNTRANSFER, 1);
    $twitterdata = curl_exec($ch);
    curl_close($ch);
    // get all the descriptions
    preg_match_all(“/([^<]+)/msi”, $twitterdata,$descs);
    // skip the main feed description
    foreach($descs[1] as $key=>$d){
    if($key=0){
    continue;
    }

    // assemble REST call and curl the result
    $url = ‘http://www.google.com/uds/GlangDetect?callback=’ .
    ‘feedresult&context=’ . $key . ‘&q=’ . urlencode($d) .
    ‘&key=notsupplied&v=1.0’;
    $ch = curl_init();
    curl_setopt($ch, CURLOPT_URL, $url);
    curl_setopt($ch, CURLOPT_RETURNTRANSFER, 1);
    $langcode = curl_exec($ch);
    curl_close($ch);
    // get the language
    preg_match(“/”language”:”([^”]+)”/”,$langcode,$res);
    // write out the list item
    echo ‘

  • ‘.$d.’
  • ‘;
    }

    ?>

Check out the result: Public twitter feed with natural language support

I will do some pure JavaScript solutions soon, too. This could be a great chance to make UGC a lot more accessible.

Thanks to Mark Thomas and Tim Huegdon for bouncing off ideas about how to work around the XHR issue.

Video captioning made easy with the YouTube JavaScript API

Wednesday, March 12th, 2008

One thing that has been annoying me for ages is that no video player on the web allows you to write comments for a specific time in the video that get displayed as plain text. Viddler allows you to comment at a certain time and it appears in the video, but the benefits of time based captioning both in terms of accessibility and SEO didn’t quite transpire to any video site maintainers yet. Edit: Darn, I hadn’t looked at Viddler for a long time, it actually does this now, well done!

Google just released a JavaScript API for YouTube which makes it dead easy to control a video with JavaScript. You can start, stop and jump to a certain time of the video but more importantly – you have events firing when something happens to the player. This made it easy for me to whip up a proof of concept how time-based captioning might work as an interface. Click the screenshot to see it in action.

Screenshot of video with timed captions created with a small JavaScript

Start the video and hit the pause button to add a new caption. You can delete captions by hitting the x links and you can jump back to the section of the video by clicking the time stamp.

Check the source for how it is done. In order to make this a service, all you need to do is have a backend script that gets all the form fields and store it in a DB.

Generating charts from accessible data tables and vice versa using the Google Charts API

Tuesday, January 8th, 2008

Google have lately been praised for their chart API and my esteemed colleague Ed Eliot has a workaround for its restrictions in terms of caching and server hits.

I played around a bit with it and thought it very cool but it felt a bit clunky to add all these values to a URL when they could be in the document for those who cannot see pie charts. This is why I wrote a small script that converts data tables to charts using the API and a wee bit of JavaScript.

Using this script you can take a simple, valid and accessible data table like the following and it gets automatically converted to a pie chart.


Browsers
BrowserPercent
Firefox60
MSIE25
Opera10
Safari5

Simply add the script to the end of the body and it’ll convert all tables with a class called “tochart”. You can define the size (widthxheight) and the colour as a hexadecimal triplet as shown in this example. If you leave size and colour out, the script will use presets you can alter as variables in the script itself.

What about data tables from charts?

As Victor of the Yahoo! Accessibility group asked for the other way around, this is now also possible. When you use the verbose data mode for the charts and add the class “totable” to the image the script will generate a data table preceeding the image and null out the alternative text. For example:


Fruit Consumption of under 15 year olds, March 2007

The tables have a class called “generatedfromchart” which you can use to move them off-left if needed.

Check out the demo page and download the script with the demo page and CSS to have a go with it yourself. Of course, all is licensed creative commons, so go nuts.

Useful? Please comment if you want something extra or wonder how the script works.