Some time ago the US government announced that they will de-classify UFO sightings material from the 50s and 60s. This caused quite the stir amongst conspiracy theorists but also plain sci-fi fans like me. They did, and – of course – the results were not that insightful.
A few days ago the government also released whitehouse.gov/aliens. Styled in the fashion of the X-files TV show, this is a web product created and published by the government. Paid for with your tax money and – given my experience working on various government projects – probably highly funded with delivery cycles that have lots of space for bureaucratic swings and roundabouts.
Watching the site, I was amused at first but soon the hair on my neck stood on end and I turned first speechless and then disgusted to my core.
This isn’t a playful site about outdated paranoid government materials about extraterrestrials, it is a live tracker of arrests of illegal immigrants portrayed like a Hollywood trailer painting the current president as the only one with the guts to rid our world of unwelcome beings living amongst us.
This is cynical, xenophobic and dehumanises a whole group of people. People, not extraterrestrial lifeforms. People with families, hopes, dreams and struggles they had to get through to be where they are now. People who are illegally where they are, yes. But instead of naming and punishing those who brought them there illegally or those who make them work without legal backup, this site gleefully celebrates when and how the victims of these illegal trades were detained. Whilst defining them as alien, not belonging and something dangerous and necessary to “remove”. People tracked and detained in a fashion that is highly debated and reminds more of government sanctioned Droogs rather than law officers just doing their job.
Let me repeat this, because it’s important: this is not some social media stunt by a YouTuber or Podcaster. This is not a xenophobic or racist subculture related private news site. This is a government funded, created and promoted product released on the most official of channels they have.
Someone designed this. Someone built this. Someone signed off the bills and the time sheets. And you paid for it. At no time during all this someone thought that this is not only beyond tasteless but also reminiscent of the darkest times in human history.
This is straight up from the totalitarian and fascist playbook: You dehumanise, you track, you detain and finally you exterminate. This should never happen again.
I grew up and now again live in Germany. During my upbringing, the horrors of the Nazi regime were still around to remember. I met victims and people “who just did their job”. I heard people say that not all was bad. I’ve encountered broken, guilt-ridden people who had no idea how to move on. School visits to concentration camps, Nazi interrogation sites and prisons were common. If you have not been to any of them, I really advise you to go. Another excellent place to keep the horrors on top of mind is the uprising museum in Warsaw, Poland.
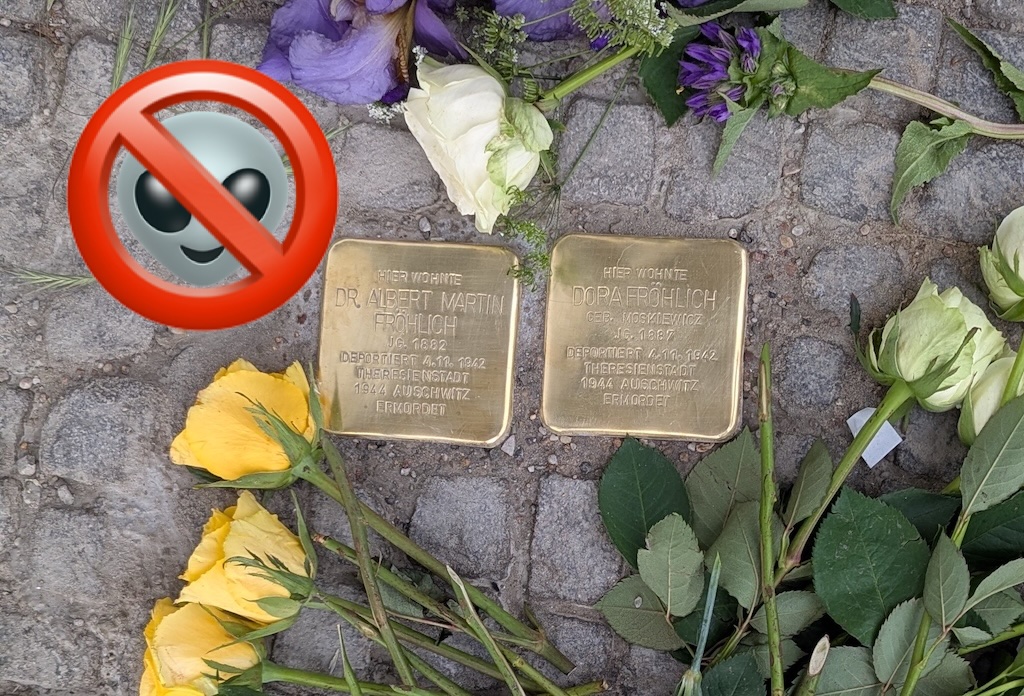
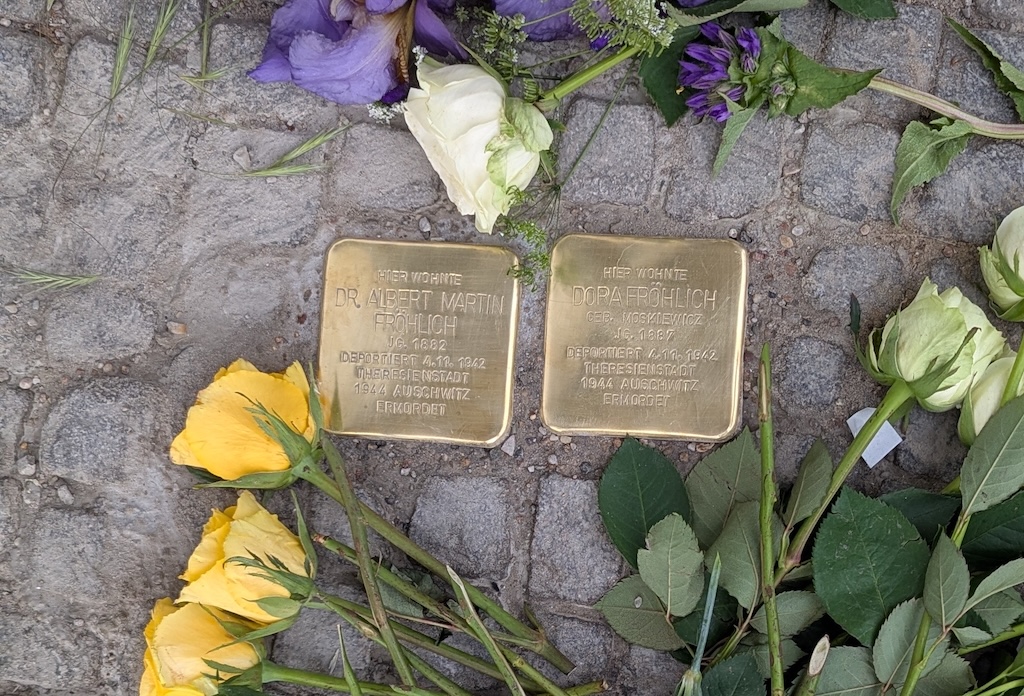
Even on my daily walks there are reminders of what happened. On a road I walk along every day there are two gilded cobblestones that remind people that on 4.11.1942 Doctor Albert Martin Fröhlich and his wife Dora were taken from their homes and brought to the prison Theresienstadt. They were both killed in Auschwitz 1944.
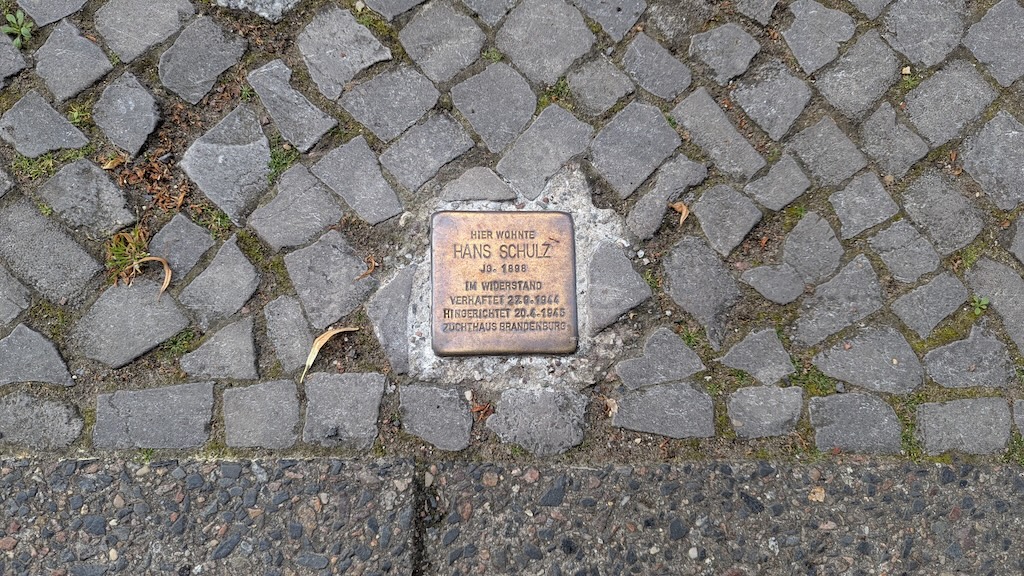
Two doors down from my house is another one of those stones. This one reminds us of Hans Schulz, a member of the resistance who got detained on the 27.9.1944 and executed in a nearby prison on the 20.4.1945.
Now, these people weren’t illegal aliens. They were Jewish and the other one was a German man of courage. Their fate was sealed when the government at the time defined them as unwanted and illegal or enemies of the state. Most likely their whereabouts were reported to the authorities of the time by law-abiding, good people. And this is a really slippery slope that we seem to be on right now again. How illegal is too much? How different do you have to be to count as “alien”? Who defines this?
Nothing that happened in the Third Reich was illegal according to the laws at that time. Nothing seemed as horrible as it turned out to be at first. People were detained and put into prison. Many people claim not to know what happened in these prisons and expected the people put there to get a fair trial and be sent somewhere they can live. There were even propaganda stories that all Jewish people would be sent to live in Madagascar.
So it felt OK for people to see these police actions take place. After all, these people did something illegal or belonged to a group of people always up to no good. The government will take them away so they can’t be a danger to the law-abiding citizens any longer.
Would you have done something?
Whenever I went to a concentration camp or museum I wasn’t surprised by the horrors and cruelty. These have been a constant throughout history, we are damn inventive and creative at causing people misery and pain. I was more baffled by how people could have stood by and allowed it to happen. How could people be blind to what is really happening?
The reason came to me much later: fear. The first thing a totalitarian government leading to fascism does is to show ultimate strength and give the impression that nothing will go past them. Total control, observation and paying and promoting people to report others. All in the name of keeping “their people” secure. People trade freedom for protection. And realise far too late that their protectors are not benevolent supporters but thugs that enjoy punishing people. So it is easy to say that you would have done something, but the reality is that most people would be too scared as they saw what happens to people who disagree and stand up. Maybe you have a family and you are worried about what happens to them. Maybe you just felt powerless, as the propaganda of the regime keeps telling you that your job is to consent and applaud, in exchange for your freedom. You vs. them, and the government is the only one that can protect you from them.
That is why the alien web site is not a fun joke, but it is a worrying decline in tone and messaging. This started earlier when the ministry of defense was renamed to the department of war. There wasn’t any at the time that this country was directly involved in, so what does that mean?
In any case, we live in worrying and scary times. Not because of the amount of crime – that is actually on the decline – but in terms of what reality is sold to us by official government channels. And that happens all around the globe. The question is where we want to stand. Someone built this web site and thought it was a fun project with an important message to the world. I hope their pay check is worth it.