A lot of technical people currently spout regressive and harsh messages about race, religion, identity and women’s rights to side with “strong man” politicians and parties. That’s their right, but it also is an abuse of reach and power. Time to focus.
A lot of the people whose work I adore and admire are terrible and weird human beings. That’s where it’s tricky to separate the art from the artist and consider if and how you want to support it. This gets even trickier when you find out more about the person, they get caught doing horrible things or their fame gets to their head and they start promoting a terrible opinion about something just because they can.
Maybe the real issue is the cult of the person and we need to stop inflating people’s egos or pretend that there is such a thing as one person’s skill and ideas being the main reason why their work becomes a success.
Artists better separated from their work
Let’s take a look at some examples:
There is no doubt that Stanley Kubrick was a genius and transported cinema into places it’s never been before. All the reports of working with him sound terrible as he pushed people to the brink of exhaustion. Studios hated working with him as every movie went far over budget.
There is also no doubt that Quentin Tarantino left an indelible mark on pop culture but I for one wouldn’t want to be locked in a broken down lift with him as the man just seems off.
Sometimes it’s the other way around: I don’t like the Roger Moore Bond movies as he comes across as smarmy, horrible towards women and silly. The more I read about Moore himself, the more I admire the person as a genuinely great chap.
Sometimes there’s no surprise at all. When Till Lindemann, the singer of Rammstein got accused of sexual misconduct and abuse nobody who ever saw the chap or can read German lyrics should feel any surprise. That doesn’t excuse it, of course.
Then we get the utterly baffling ones. JK Rowling created an amazing world with Harry Potter (and failed to extend it to more with Fantastic Beasts). The first few books were questionable when it comes to the quality of writing, but the world building was amazing and the overall arc of seven books getting darker and darker as the main protagonist got older was excellent.
Rowling built a magical world where love is the strongest power, even protecting yourself against non-blockable death spells. A world full of magical creatures, some of them half human, and a pivotal gay character. A world where the good people stand up for the rights of merpeople, centaurs and elves and the bad people bang on about blood purity. A world where dark forces use weak politicians to break down the order and establish a fascist regime. It’s a great depiction of what can go wrong if people strive for power at all cost.
How a person responsible for a world like that can not mount the mental curb that some people aren’t the gender they were born as baffles me. That a person that did the great thing of paying her taxes and giving back to a social system that once supported her now spends her money on lobbying to get laws in place that limit the freedom of people baffles me even more.
Help, I’m being censored!
Currently hordes of old comedians complain that everything is too woke and they are being censored because they can’t tell their old racist and sexist jokes and that people were much more open then or “could still take a joke”. Maybe they couldn’t even back then but society was less evolved and considered a sexist statement just a thing that women should be “open enough” to endure. Or – maybe your art should have evolved with the society we are in now.
My favourite is podcasters with hundreds of thousands of listeners banging on about that they are being censored. Both them and their listeners would do well to look up irony.
Power and reach corrupts people
Maybe it is really true that power, reach and wealth corrupts. I even felt that with the limited impact I have. I wrote books, taught courses and spoke at hundreds of events over the years. I was on podcasts, on panels, an invited expert on some lawmaking processes and got interviewed by mainstream media. This feels good and you think you should use that reach and fame to also do more and bring your beliefs and political ideas to people, too. After all, they are yours and can only be correct and amazingly insightful, right?
People ask you for all kinds of advice, too. What computer you use and if it’s the best there is. What they should do to be as successful as you are. What you think of other successful people and products. Where you think everything is heading. It is stifling and scary that people think everything you do and touch is the correct way of doing things. But it is also tempting to start believing that.
Fact is that we all talk bollocks from time to time and it’s easy to get excited about your own success and make blanket, cool sounding statements.
Aligning with the strongest voices
Currently there is something really worrying and disgusting happening. Leaders of countries, owners of media outlets, politicians and company owners start embracing strong, simple, regressive messages. Dividing messages and calls to return to values of old. Where men were real men, women were there to have children and everybody was healthy, fit and strong. Where the strongest survived and there was a clear hierarchy of worth when it comes to what people look like. In other words, a fairy tale of things being better in the old days before we had to care about what other people feel. Nobody calls out for proof, blatantly lying about your achievements is considered a normal way of “fake it till you make it”.
And this is where a lot of people see their chance to get a slice of power. They repeat and amplify these messages and paint themselves as better than others because of their successes and because they concentrated on being an alpha person. They also wallow in self victimisation painting themselves as people forced for years to keep silent and now finally have a chance to say what they really think. That these topics mesh to 100% with the rhetoric of the current strong man politics can surely only be coincidence.
The most evil character in Harry Potter isn’t Voldemort. It’s Umbridge. The most evil character in DS9 isn’t Gul Dukat. It’s Kai Winn. The enablers, the repeaters, the multipliers of control, censorship and exclusion.
And this is what I see right now when I look at tech bros, podcasters and washed out celebrities siding with the enemies of progress. This isn’t about believing what they say, this is about seeing an opportunity.
In every totalitarian regime there were people who gave inhuman orders. There were others who executed them, either because they believed them to be necessary or because they were scared of the consequences when they didn’t follow the orders. And then there were thousands of people who looked the other way or felt powerless to prevent these atrocities. They didn’t commit crimes, but they enabled them.
Is cancellation the solution?
Many people spouting hatred complain about “cancel culture” and movies, music and podcasts being cancelled because they won’t fit the “woke agenda”. This does exist and maybe being too zealous about this topic is to blame for this counter movement. I’ve been uninvited to speak at events because of things I said and even more often about things people heard other people say that I did or said. This hurts and there is not much you can do about it. I used it to introspect and learn to care more about what I say and do especially if it could be taken out of context.
When it comes to existing art not being shown anymore, I’m not for cancellation at all. Keep showing old programs unless they actually by now represent hate speech. Show them with warning and explanation to consider them as a product of that time and place. If you don’t do that, people can’t learn and will create new products that make the same mistakes.
It’s not about legitimising inappropriate content, it’s about making it obsolete and embarrassing.
If we stopped showing anything inappropriate, the whole Mel Brooks back catalogue would be gone, and that would be a shame. His work was lampooning everything and everyone and it was funny as hell. And the artist himself helped a lot of others succeed. Also see: South Park.
When it comes to new content being created, it’s about context. A far right podcaster spouting hatred towards immigrants comes with the territory. The job of all of us is to detect lies, hyperbole and conspiracies and shine a big light on them. You won’t be able to sway their already existing audience but you can warn others and uncover the rat catching method behind the tirades.
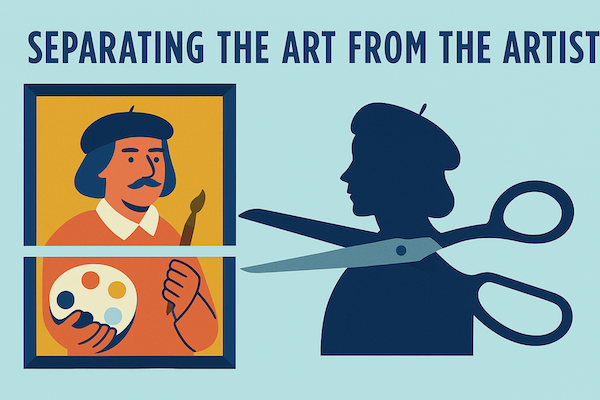
Let’s separate the art from the artist
We always talk about separating the art from the artist when it comes to excusing the ongoing showing of movies and music of people who turned out to be toxic.
We could use this and turn it around though: separate the work on the product from the biased messages they try to also tell the world about.
I don’t need the opinion of a football player on the Middle East in prime time news. Morrisey brings nothing of value to the table when it comes to Brexit. Seeing John Cleese becoming the very limited and bigoted person he lampooned in Monty Python and Fawlty Towers is painful to watch.
If a presenter at a technical conference bangs on about being an Alpha male, racial purity or family values that is simply hijacking the speaking slot. As a moderator I’d have no qualms interrupting and stopping the talk. Not to censor but to avoid wasting everybody’s time. If someone is invited to give a specialist talk and requests to also bring in their radical beliefs, I will not pick that person. Stage time, podcast time and online interview time should be considered precious to give usable information to the audience, not give hatred a platform.
We need to break the fandom and admiration down to focus on the things that person does well. I can tell you tons about building accessible interfaces and writing maintainable code. If I ever give advice on how to raise a child I’ll be talking nonsense as I’ve never done it. So disregard my advice in this matter and tell me to stop.
Warning bells should go off any time the creator isn’t willing to separate their ideals (or those he or she repeats to get on the good side of those in power) from their product.
A developer of a highly successful framework or app speaking their political mind on their social platforms is their right.
The same person publishing them on the official blog of the product or starting to stop contributions from people not aligned with their beliefs is an abuse of power. The community of that product should react accordingly, calling out that this behaviour isn’t wanted, limit the powers of that person or – in the worst case – fork it. That isn’t censorship, it’s acting against a hostile takeover from within much like any other social engineering hacking attempt.
As a customer or consumer of that person’s product it’s up to you if you want to support such abuse as the product is too useful or if you want to consider alternatives. Nobody has to agree with those who shout the loudest. And being an expert in one thing that gives you a large following doesn’t mean we need to hear you evangelising your truth on all other matters.