Christian Heilmann

You are currently browsing the Christian Heilmann blog archives for April, 2020.

Archive for April, 2020

Limiting input type=”color” to a certain palette (from an image)
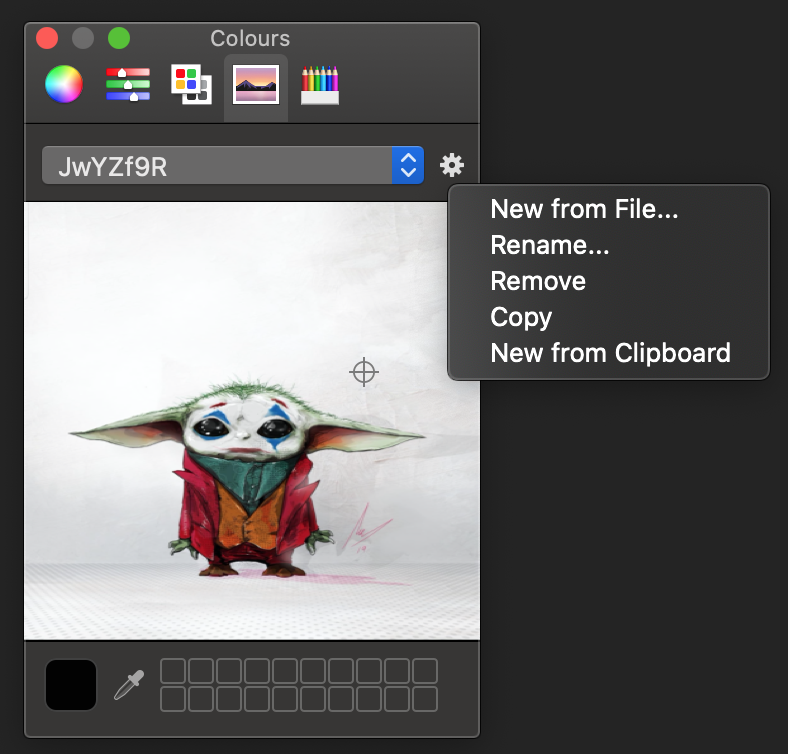
Wednesday, April 22nd, 2020

The colour input type is pretty amazing, if you think about it. You can pick a colour from it and there are lots of great presets available. The colour picker is provided by the OS for the browser, so it differs from machine to machine. I, for example, totally missed that on a Mac, you can pick a colour from an image with it. The “spectrum” option is in fact an image and you can replace it.

Picking a colour from the colour spectrum

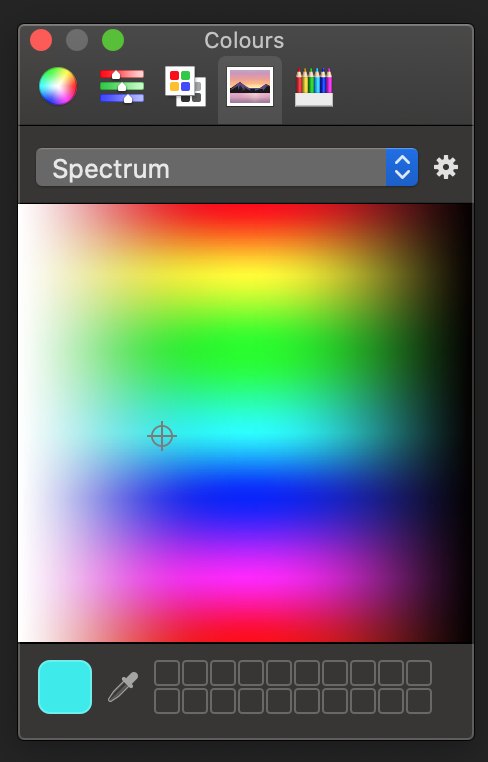
Simply drag and drop any image into it or use any of the other options available from the cog menu.

Picking a colour from an image

Get an image into the colour picker

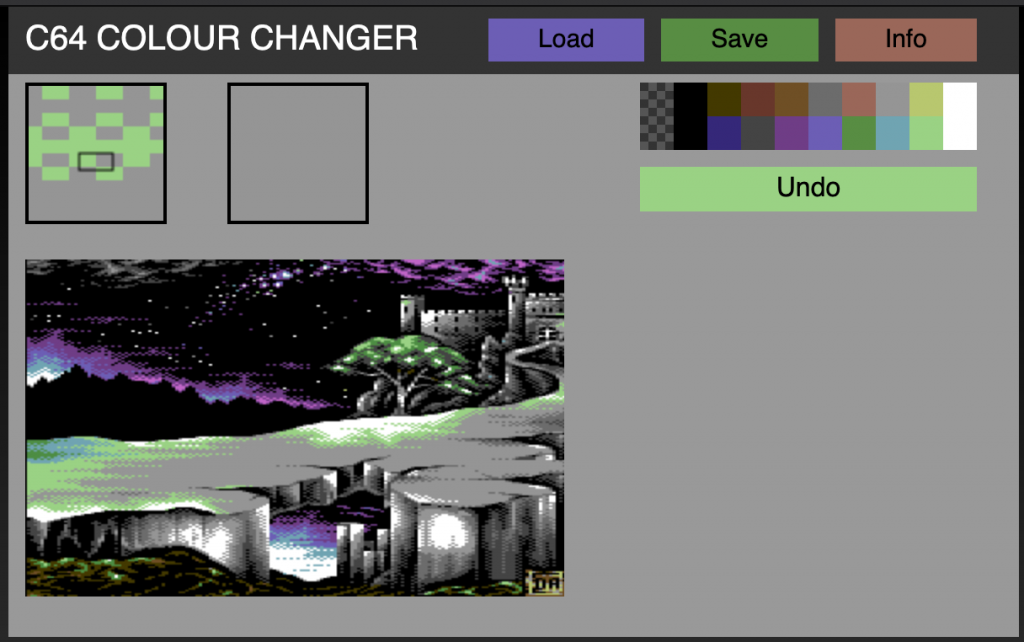
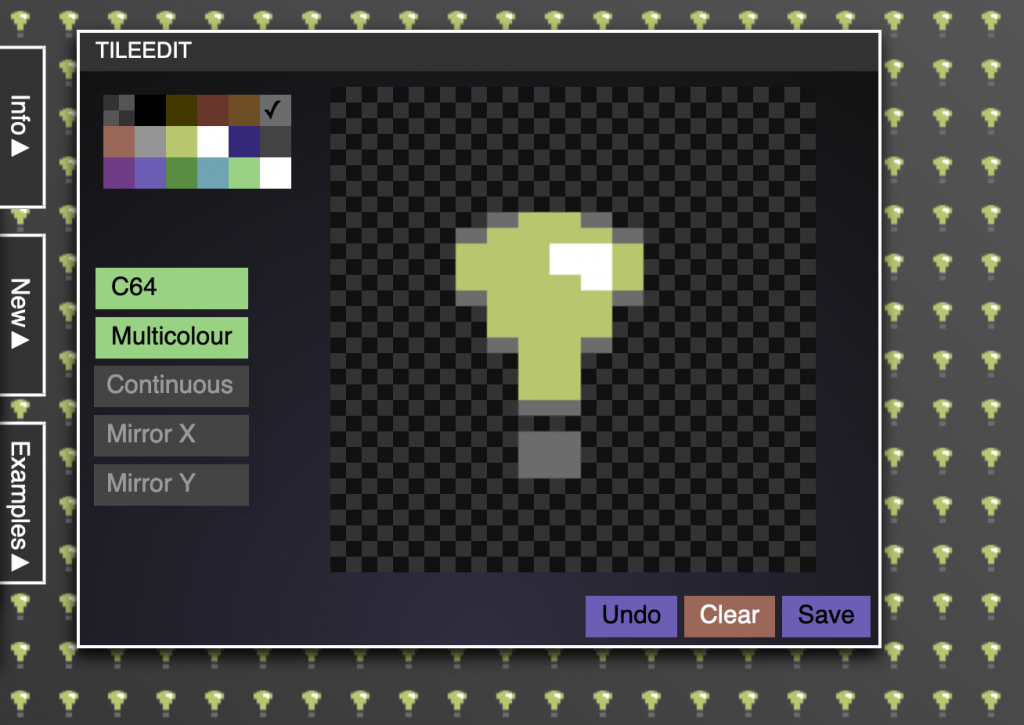
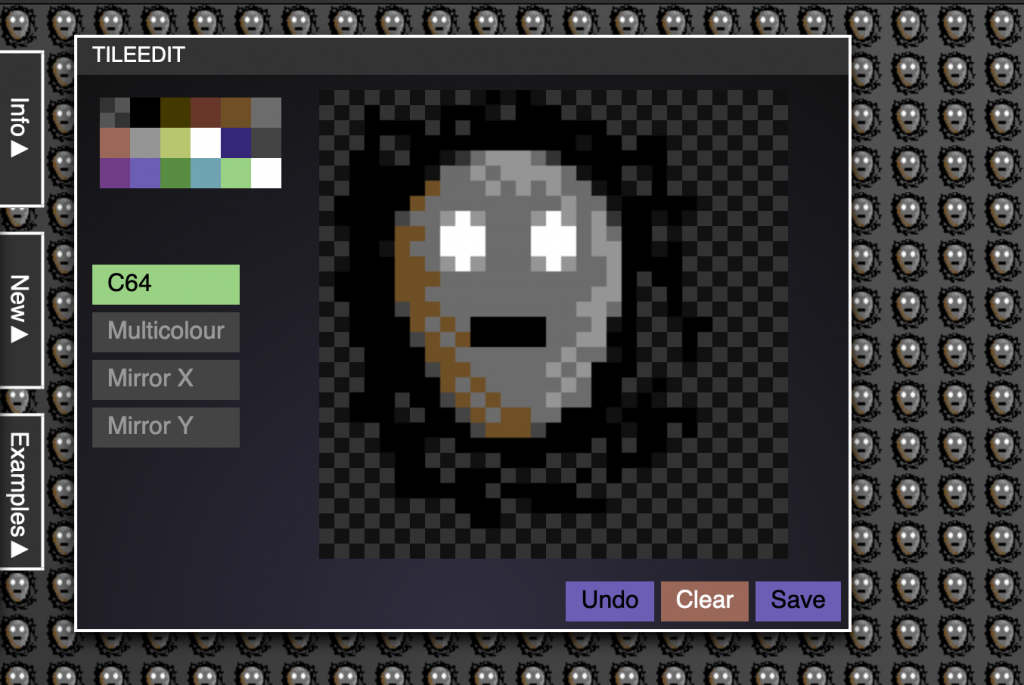
But what if you want to do limit the colours available to the colours used in an image? That’s what I needed and here begins our journey.

The input type colour supports the list attribute, which allows you to define a preset list of options. For example, the following code limits the colour picker to grey, white and blue.

<input type="color" list="presets"></label>
<datalist id="presets">
  <option value="#cccccc">Grey</option>
  <option value="#ffffff">White</option>
  <option value="#6699cc">Blue</option>
</datalist>

The colours need to be defined as hexadecimal colours. They can be defined as values or text inside the option tags, but the values take precedence.

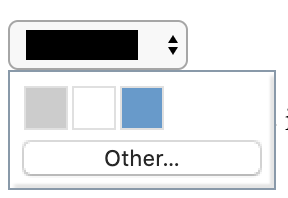
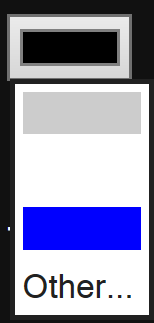
On Chromium browsers like Edge and Chrome this renders as a group of colour swatches and a “more” button to turn on all the features of the colour picker.

Colour Picker with limited palette on Chromium

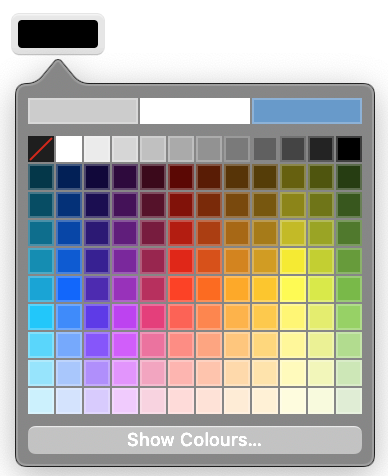
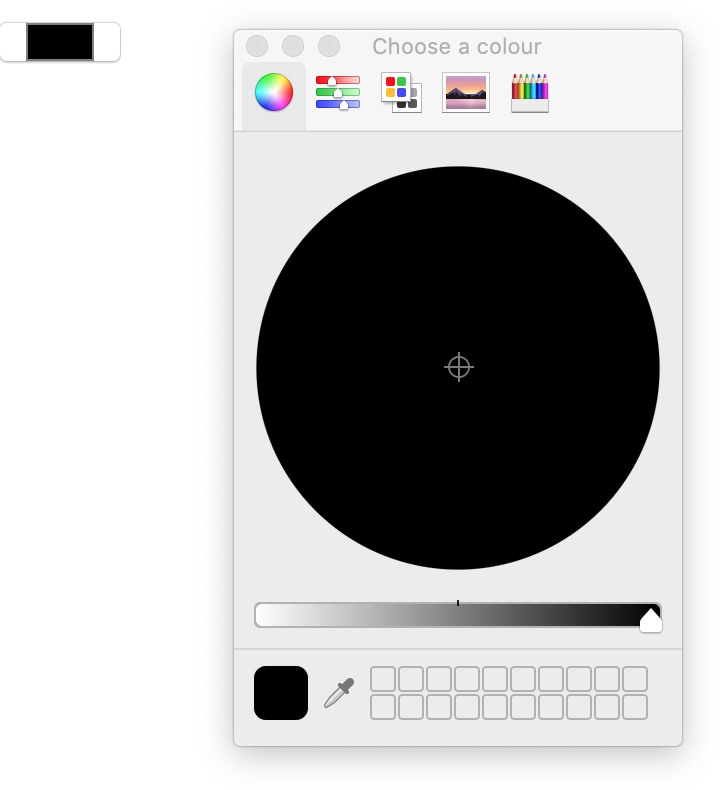
On Safari, it looks a bit different.

Colour Picker with limited palette on Safari

On Windows, it looks a bit different, but has the same functionality. In the current Edge it looks like this:

Colour Picker on Chromium Based Edge on Windows

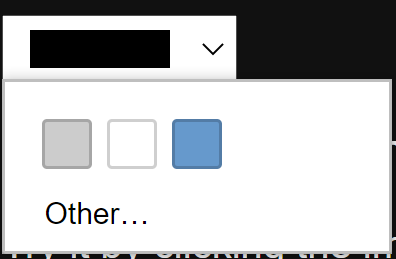
And on older Edge versions like this:

Colour Picker on Old Edge on Windows

In Firefox, it doesn’t limit the colour picker, sadly enough, and there is a six year old bug reported on it.

Firefox not limiting the colour picker to a preset

So, how can we get all the colours from an image and make it the palette of the colour picker? We use HTML5 canvas and populate the list dynamically.

You can see all of this working in this demo on GitHub. The code is heavily documented, but let’s go through the steps now.

First, we need to get the image. This could be done by loading it with a file picker, drag and drop or paste. I just wrote about that here, and re-used the code for this.

Once we have the image we create a new Image object and send it to our analysis method when it is loaded:

const loadImage = (file) => {
  var img = new Image();
  img.src = file;
    img.onload = function() { analyseColours(img); }
  }

As the image could be big and have a lot of colours, it is prudent not to analyse the colours on the main thread but use a Worker instead.

let worker = new Worker('imagecolouranalyser.js');
worker.addEventListener('message', (e) => {
    addToColourPicker(e.data);
}, false);
worker.addEventListener('error', (e) => {
    console.log('worker error', e);
}, false);

The analyseColours method creates a new canvas element, resizes it to the dimensions of the image (so we get all the pixels) and draws the image onto it. We then get the image data of the canvas and send it to the worker file.

const analyseColours = (img) => {
    let c = document.createElement('canvas');
    let cx = c.getContext('2d');
    let w = img.naturalWidth;
    let h = img.naturalHeight;
    c.width = w;
    c.height = h;
    cx.drawImage(img, 0,0);
    let pixels = cx.getImageData(0, 0, w, h).data;
    worker.postMessage(pixels);
}

Inside the worker we listen to an incoming message and analyse the pixels by looping through the data array:

const process = (e) => {
    var data = e.data;
    let all = data.length;
    let coloursused = new Set();
    for (i = 0; i < all; i += 4) {
        let hex = ''+
            rgbToHex(data[i]) +
            rgbToHex(data[i+1]) +
            rgbToHex(data[i+2]);        
        coloursused.add(hex);
    }
    postMessage(coloursused);
}
const rgbToHex = (col) => {
    return parseInt(col,10).toString(16);
}
addEventListener('message', process, false);

We create a new Set to hold the values of the unique colours we find. A Set is perfect there as it automatically removes duplicates added to it. Another option would have been to use an Object and the colours as keys.

The image data of a canvas is an array of all the pixel colour values as their RGBa values. Thus we need to loop through it in steps of 4. We assemble a string by converting the Red, Green and Blue values into hexadecimals. Once the loop is done we send the Set back to the main thread and thus to the addColourPicker() method, which is the Worker listener defined earlier.

const addToColourPicker = (colours) => {
    let out = '';
    colours.forEach(c => {
      out += `<option value="#${c}"></option>`
    });
    datalist.innerHTML = out;
    colourpicker.click();
}

We create a new string called out, loop over all the colour values and add an option element for each. We set the innerHTML of the datalist to this string and fire a click event on the colour picker. This last thing is mostly for the demo, it isn’t needed for the functionality. Weirdly enough Safari doesn’t do anything with that.

So that’s it, limiting a colour picker to a certain palette can pretty much save you from having to write a complex UI yourself, and I bet the colour picker will be more accessible than anything we create ourselves.

The joy of pixeling and building pixel tools with HTML5 canvas and JavaScript

Friday, April 17th, 2020

Some people knit, others do puzzles, and yet others find calm by colouring. Me, I love pixeling. My computer career started with a super basic computer. It didn’t even have a way to store what I programmed. So, every day, I would write myself a small program that allows me to paint on the screen using the cursor (there was no mouse). I’d paint something, turn off the machine and all was gone.

I love working within constraints, it fuels my imagination. I love trying to push the boundaries but also found a lot of happiness in making the best with what is possible.

Pixel logo saying Diversidty

The big computer of my youth was the Commodore 64. On this machine I did a lot of pixeling for the demo scene. A huge part of my professional network came from that sub-culture and it is fun to keep in contact with people you were in competition with in the 90s. The main input was keyboard and joystick. Painting swoops and natural shapes was tough. It meant knowing how to set pixels of the correct colours next to one another and let the human brain do the rest. Our eyes are lazy and our brain craves harmony. We’re happy to fill a gap between two points and make the design appear smoother to us than it is.

So, when I want to pretend I am artistically gifted, I go back to pixeling logos and fonts. Lacking space for a real Commodore 64, I use an emulator and some special tools. These have the same constraints as the real machine:

  • 16 pre-defined colours
  • 320ˣ200 pixels resolution
  • Two colours per each 8×8 square in hi-res mode
  • One background colour for the whole screen and 3 colours per each 8ˣ8 square in multicolour mode. In this code pixels are 1ˣ2 pixels and not 1ˣ1.

Tooling is fun these days, and Multipaint does an OK job to convert non-compliant graphics. My old Photoshop isn’t running on my current version of MacOS. So I started using PhotoPea in the browser for some of the conversions.

I soon discovered though that there are some things that are hard to do, so I wrote some tools to help myself. And for this, of course, I used JavaScript and canvas in the browser.

Canvas is awesome. Its paint API is odd and rudimentary, but I love that it turns any image into an array of pixels. And that you can manipulate things and then save them as a PNG.

So, to help myself paint some things for upcoming demos, I wrote a few tools in the browser. These are all open source and on GitHub. Have a peek and maybe there is something in there of interest for you.

C64 Colour Changer

C64 Colour Changer

I lost a lot of my old floppy disks and some of my old work only exists as screenshots. And depending who did those the colours are off and I can’t remix or use them. Using a “select colour range” in PhotoPea is a pain, so I wrote a small tool to re-colour images.

You can check the Colour Changer here
and the source is on GitHub

TileEdit

Tile Edit Multicolour Mode

TileEdit is a small pixel editor that allows you to paint seamless tiles. I needed that for some 3D ball texture animation and no tool allowed me to to do what I wanted.

Tile Edit Hires Mode

Now I can use this to paint C64 textures, and I also added a feature to paint general pixel textures. You can choose any colour with a colour picker and you are not limited to the C64 limitations.

The Tile Edit Source is also on GitHub.

Logo-O-Matic

Logo-O-Matic in the browser

I’ve written this in PHP using imageMagick ages ago and changed it to a canvas solution a few years ago. Now, Logo-O-Matic features 64 charsets (a lot by me). You can pick one, type your logo text, switch colours around, fix kerning and word spacing, add a character offset and save your cool retro logo.

jenkins in an old 8 bit font

linkedin in an old 8 bit font

github in an old 8 bit font

The Logo-O-Matic source is also on GitHub.

Ongoing work

I love the simplicity of pixeling and its repetitive nature. I especially the way you can create a whole charset from the “8” character and changing a few pixels around. And I love that I can use plain vanilla JavaScript to create myself tools that I don’t get otherwise. Maybe you can also find some joy in this.

But now back to work on the lovely Edge browser and compatibility

Edge Logo in C64 Mode

Firefox Logo in Multicolour

Quick solution: getting the mouse position on an element regardless of positioning

Thursday, April 2nd, 2020

As I was upgrading an older codebase of mine that used layerX and layerY I looked into a very succinct way of finding the current mouse position on any element regardless of its position, scrolling, padding, margin and such and I found this to work for me, so maybe it is good for you, too.

const getposition = ev => {
  let x = ev.clientX;
  let y = ev.clientY;
  let pos = ev.target.getBoundingClientRect();
  // the bitwise shift |0 rounds non-integer values down.
  // if you want to round up, use 1.
  return {
    x: x - pos.x|0,
    y: y - pos.y|0
  };
}

Here’s a codepen of it in action, and you can play with it and give it more annoying things to deal with.


See the Pen
Get mouse position on element.
by Christian Heilmann (@codepo8)
on CodePen.