Christian Heilmann

You are currently browsing the Christian Heilmann blog archives for August, 2016.

Archive for August, 2016

What does a developer evangelist/advocate do?

Monday, August 29th, 2016
I love it! What is it?

Today I was asked to define the role of a developer evangelist in my company for a slide deck to be shown at hiring events and university outreach. This was a good opportunity to make a list of all the tasks we have to do in this job and why we do them. It might be useful for you to read through, and a good resource to point people to when they – once again – ask you “but, do you still code?”.

First things first: Whenever you write about this topic there is a massive discussion about the job title ” evangelist” and how it is terrible and has religious overtones and whatnot. So if that is what bothers you, please choose below what you’d like to read and your browser will change it accordingly to give you peace of mind:


Now, what is a developer evangelist? As defined in my developer evangelist handbook:

A developer evangelist is a spokesperson, mediator and translator between a company and both its technical staff and outside developers.

What do you need to know to be one? First there are the necessary skills:

  • Great development skills – both in creating and explaining software and products
  • Excellent communication skills – this job is about reaching out, listening and distilling information
  • Excellent networking skills – you’re meant to collect contacts and keep them happy

Then there are also important skills to have:

  • Patience of a saint – you will need to have to explain your job over and over and will have to defend your lack of ”not writing code”
  • Strong sense of independence – your job is to help communication by aiding with your voice. You’re not in sales.
  • Excellent self-organising skills – you’re on the road a lot and if you don’t take care, you burn out quickly or get buried under an avalanche of requests.

Being a developer evangelist is a role that spans across several departments. Your job is to be a communicator. Whilst you are most likely reporting to engineering, you need to spend a lot of time making different departments talk to another. Therefore internal networking skills are very important. Your job also affects the work of other people (PR, legal, comms, marketing). Be aware of these effects and make sure to communicate them before you reach out.

As a translator, you have both outbound (company to people) and inbound (people to your company) tasks to fulfil. Let’s list most of them:

Outbound tasks

Be a social media presence

Provide a personal channel to ask about your company or products. People react much better to a human and interact more with them than with a corporate account. Be yourself – at no point you should become a corporate sales person. Do triage – point people to resources to use like feedback channels instead of talking on their behalf Don’t make decisions for your colleagues. Help them, don’t add to their workload.

Keep up to date with competition and market

You’re the ear on the ground – your job is to know what the competition does and what gets people excited. Use the products of your competition to see what works for you and their users and give that feedback to your teams. Detect trends and report them to your company.

Create openly available software products

You need to develop software products to keep up to date technically and show your audience that you’re not just talking but that you know what you’re doing. These should be openly available. In many cases, your company can’t release as freely as you can. Show the world that you’re trusted to do so. Building products also allows you to use tools outside developers use and feed back your experiences to your company

Participate in other products

Take part in other people’s open source products. That way you know the pains and joys of using them. Your job is to be available. By providing helpful contributions to other products people judge you by your work and how you behave as a community member, not as a company person. Analysing how other products are run gives you great feedback for your teams.

Participate in public discussions

A lot of discussion happens outside your company, on channels like Stackoverflow, Slack, Facebook Groups, Hacker News and many more. You should be monitoring those to a degree and be visible, bringing facts where discussions get heated. These are great places to find new influencers and partners in communication.

Participate in other publications

Taking part in other publications than your own and the ones of your company solidifies your status as a thought leader and influencer. Write for magazines, take part in podcasts and interview series. Help others to get their developer oriented products off the ground – even when they are your competition.

Create video tutorials

Creating short, informative and exciting videos is a great opportunity to reach new followers. Make sure you keep those personal – if there is a video about a product, help the product team build one instead. Show why you care about a feature. Keep these quick and easy, don’t over-produce them. These are meant as a “hi, look at this!”.

Participate and help with events

Present and give workshops at events. Introduce event organisers and colleagues or other presenters you enjoyed. Help promote events. Help marketing and colleagues at events to make your presence useful and yielding results.

Act as a “firewall” for internal teams

People working on products should spend their time doing that – not arguing with people online
Your job is to take negative feedback and redirect it to productive results
This means in many cases asking for more detailed reporting before working with the team to fix it.
It also means managing expectations. Just because a competitor has a cool new thing doesn’t mean your company needs to follow. Explain why.

Help dealing with influencers

If you do your job right and talk to others a lot, what other people call ”influencers” are what you call friends and contacts. Show them how much you care by getting them preview information of things to come. Make sure that communication from your company to them goes through you as it makes outreach much less awkward. Find new upcoming influencers and talk to your company about them.

Inbound tasks

Stay up to date and participate in products

There is no way to be a developer evangelist for a company if you don’t know about the products your company does. You need to work with and on the products, only then can you be inspiring and concentrate on improving them. Working on the products also teaches you a lot about how they are created, which helps with triaging questions from the outside.

Keep product teams and internal engineering up to date

It is important to report to your product teams and engineers. This includes feedback about your own product, but also what positive and negative feedback the competition got. This also includes introducing the teams to people to communicate with in case they want to collaborate on a new feature.

Amplify messaging of internal teams

Your colleagues bring great content, it is your job to give it reach. Amplify their messages by spreading them far and wide and explaining them in an understandable fashion to different audiences. Tell other influencers about the direct information channels your teams have.

Coach and promote internal talent

It is great that you can represent your company, but sometimes the voice of someone working directly on a product has more impact. Coach people in the company and promote their presence on social media and at events. Connect conference organisers and internal people – make sure to check with their manager to have them available. Help people present and prepare materials for outreach.

Report on events and success of campaigns

Being at an event or running a campaign should be half the job. The other half is proving to the people in the company that it was worth it. Make sure to collect questions you got, great things you learned and find a good way to communicate them to the teams they concern. Keep a log of events that worked and those who didn’t – this is great information for marketing when it comes to sponsorship.

Help organising events

It is important to be involved in the events your company organises. Try not to get roped into presenting at those – instead offer to coach people to be there instead. Offer to be on the content board of these events – you don’t want to be surprised by some huge press release that says something you don’t agree with. Use your reach to find external speakers for your events.

Work with PR, legal and marketing

Your work overlaps a lot with those departments. Be a nice colleague and help them out and you get access to more budget and channels you don’t even know about. Make sure that what you say or do in your job is not causing any legal issues.

Give constructive feedback to the product teams and get questions answered

You’re seen as a approachable channel for questions about your products. Make sure that requests coming through you are followed up swiftly. Point out communication problems to your internal teams and help them fix those. Use external feedback to ask for improvements of your own products. It is easy to miss problems when you are too close to the subject matter.

Collate outside feedback and convert to constructive feedback

Your colleagues are busy building products. They shouldn’t have to deal with angry feedback that has no action items in it. Your job is to filter out rants and complaints and to analyse the cause of them. Then you report the root issue and work with the teams how to fix them.

Why take on this job?

Considering how full your plate is, the following question should come up:

Why would you want to become a developer evangelist (or developer advocate)?

There are perks to being someone in this role. Mostly that it is a natural progression for a developer who wants to move from a delivery role to one where they can influence more what the company does.

  • It bridges the communication gap – developers have a bad reputation when it comes to communication. Showing that someone technical can help understanding each other is a good move for our market.
  • It helps avoiding frustration – a lot of engineering is not needed, but based on false assumptions or misguided “I want to use this”. Good evangelism helps building what is needed, not what is cool.
  • It bridges age and culture gaps – if you’re not interested in a cutthroat competition in engineering, you have a chance to use your talent otherwise.

Before you jump on the opportunity, there are some very important points to remember:

  • Developer relations is not a starting position – most developer evangelists graduated from being developers in the same company. You need to know the pain to help prevent it.
  • There are part time opportunities though – engineers or people learning in the company can help with Devrel to ease into the job earlier.
  • Always be ready to prove your worth – measuring the impact of a developer evangelist is tough, you need to make sure you’re well organised in recording your successes.

It’s a versatile, morphing and evolving role. And that – to me – makes it really exciting.
Songsearch – using ServiceWorker to make a 4 MB CSV easily searchable in a browser

Friday, August 26th, 2016

A few days ago I got an email about an old project of mine that uses YQL to turn a CSV into a “web services” interface. The person asking me for help was a Karaoke DJ who wanted to turn his available songs into a search interface. Maintenance of the dataset happens in Excel, so all that was needed was a way to display it on a laptop.

The person had a need and wanted a simple solution. He was OK with doing some HTML and CSS, but felt pretty lost at anything database related or server side. Yes, the best solution for that would be a relational DB, as it would also speed up searches a lot. As I don’t know for how much longer YQL is reliably usable, I thought I use this opportunity to turn this into an offline app using ServiceWorker and do the whole work in client side JavaScript. Enter SongSearch – with source available on GitHub.

the songsearch interface in action

Here’s how I built it:

  • The first step was to parse a CSV into an array in JavaScript. This has been discussed many a time and I found this solution on StackOverflow to be adequate to my uses.
  • I started by loading the file in and covering the interface with a loading message. This is not pretty, and had I had my own way and more time I’d probably look into streams instead.
  • I load the CSV with AJAX and parse it. From there on it is memory for me to play with.
  • One thing that was fun to find out was how to get the currently selected radio button in a group. This used to be a loop. Nowadays it is totally fine to use document.querySelector(‘input[type=”radio”][name=”what”]:checked’).value where the name is the name of your radio group :)
  • One thing I found is that searching can be slow – especially when you enter just one character and the whole dataset gets returned. Therefore I wanted to show a searching message. This is not possible when you do it in the main thread as it is blocked during computation. The solution was to use a WebWorker. You show the searching message before starting the worker, and hide it once it messaged back. One interesting bit I did was to include the WebWorker code also as a resource in the page, to avoid me having to repeat the songsearch method.
  • The final part was to add a ServiceWorker to make it work offline and cache all the resources. The latter could even be done using AppCache, but this may soon be deprecated.

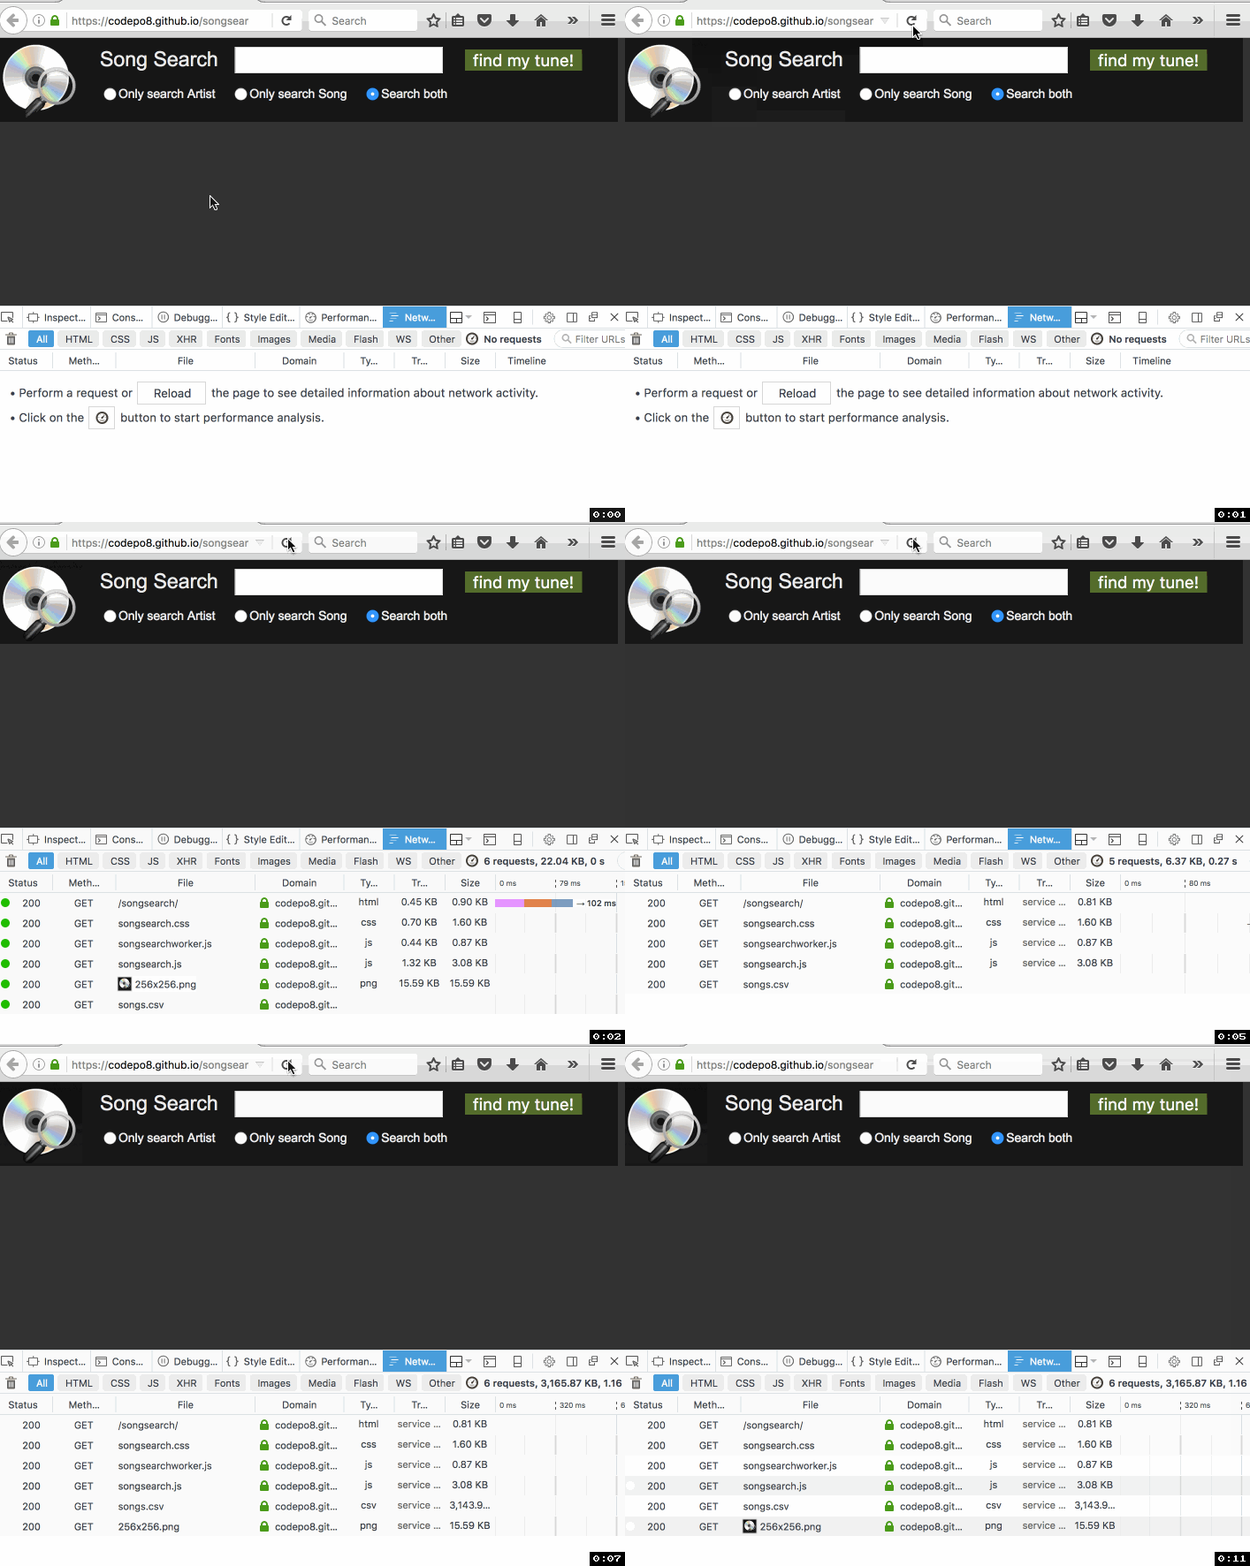
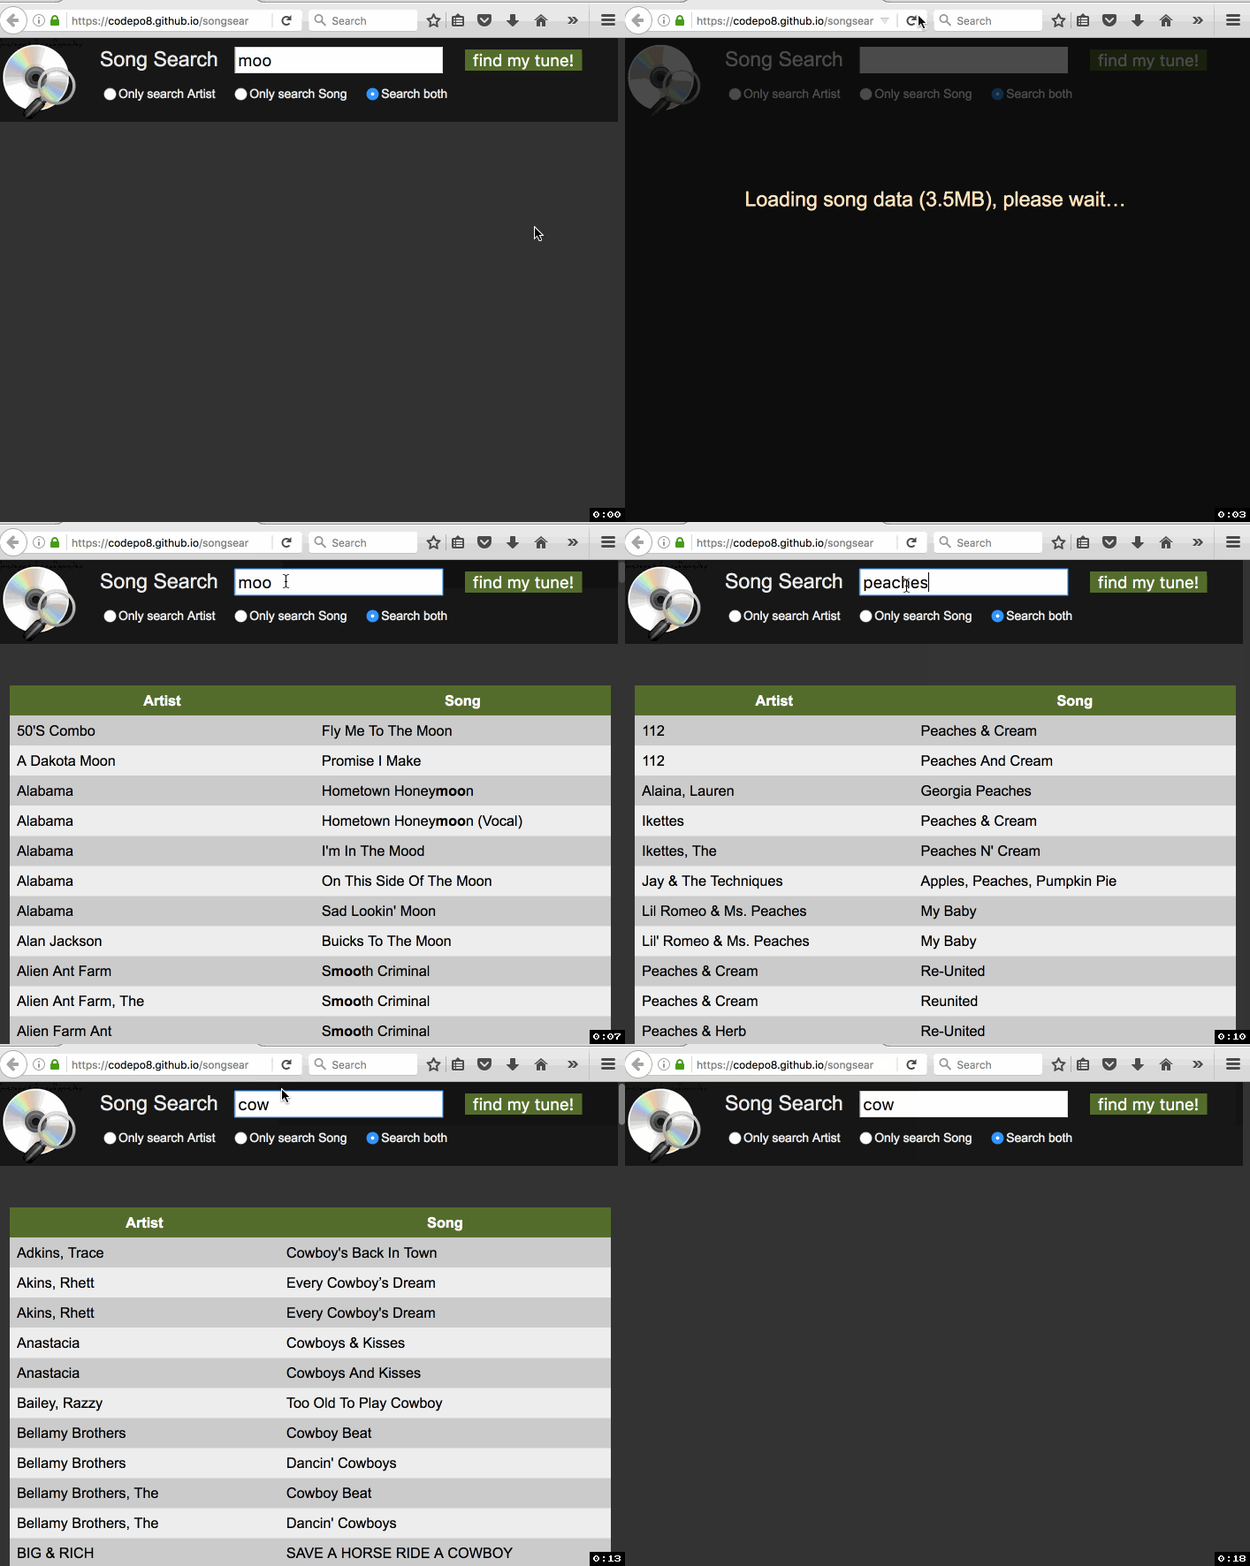
As you can see the first load gets the whole batch, but subsequent reloads of the app are almost immediate as all the data is cached by the ServiceWorker.

Loading before and after the serviceworker cached the content

It’s not rocket science, it is not pretty, but it does the job and I made someone very happy. Take a look, maybe there is something in there that inspires you, too. I’m especially “proud” of the logo, which wasn’t at all done in Keynote :)

New blog design – I let the browser do most of the work…

Tuesday, August 23rd, 2016

Unless you are reading the RSS feed or the AMP version of this blog, you’ll see that some things changed here. Last week I spent an hour redesigning this blog from scrarch. No, I didn’t move to another platform (WordPress does the job for me so far), but I fixed a few issues that annoyed me.

So now this blog is fully responsive, has no dependencies on any CSS frameworks or scripts and should render much nicer on mobile devices where a lot of my readers are.

It all started with my finding Dan Klammers Bytesize Icons – the icons which are now visible in the navigation on top if your screen is wide enough to allow for them. I loved their simplicity and that I could embed them, thus having a visual menu that doesn’t need any extra HTTP overhead. So I copied and pasted, coloured in the lines and that was that.

The next thing that inspired me incredibly was the trick to use a font-size of 1em + 1vw on the body of the document to ensure a readable text regardless of the resolution. It was one of the goodies in Heydon Pickering’s On writing less damn code post. He attributed this trick to Vasilis who of course is too nice and told the whole attribution story himself.

Next was creating the menu. For this, I used the power of flexbox and a single media query to ensure that my logo stays but the text links wrap into a few lines next to it. You can play with the code on JSBin.

The full CSS of the blog is now about 340 lines of code and has no dependency on any libraries or frameworks. There is no JavaScript except for ads.

The rest was tweaking some font sizes and colours and adding some enhancements like skip links to jump over the navigation. These are visible when you tab into the document, which seems a good enough solution seeing that we do not have a huge navigation as it is.

Other small fixes:

  • The code display on older posts is now fixed. I used an older plugin not compatible with the current one in the past. The fix was to write yet another plugin to un-do what the old one needed and giving it the proper HTML structure.
  • I switched the ad to a responsive one, so there should be no problems with this breaking the layout. Go on, test it out, click it a few hundred times to give it a thorough test.
  • I’ve stopped fixed image sizes for quite a while now and used 100% as width. With this new layout I also gave them a max width to avoid wasted space and massive blurring.
  • For videos I will now start using Embed responsively not to break the layout either.

All in all this was the work of an hour, live in my browser and without any staging. This is a blog, it is here for words, not to do amazing feats of code.

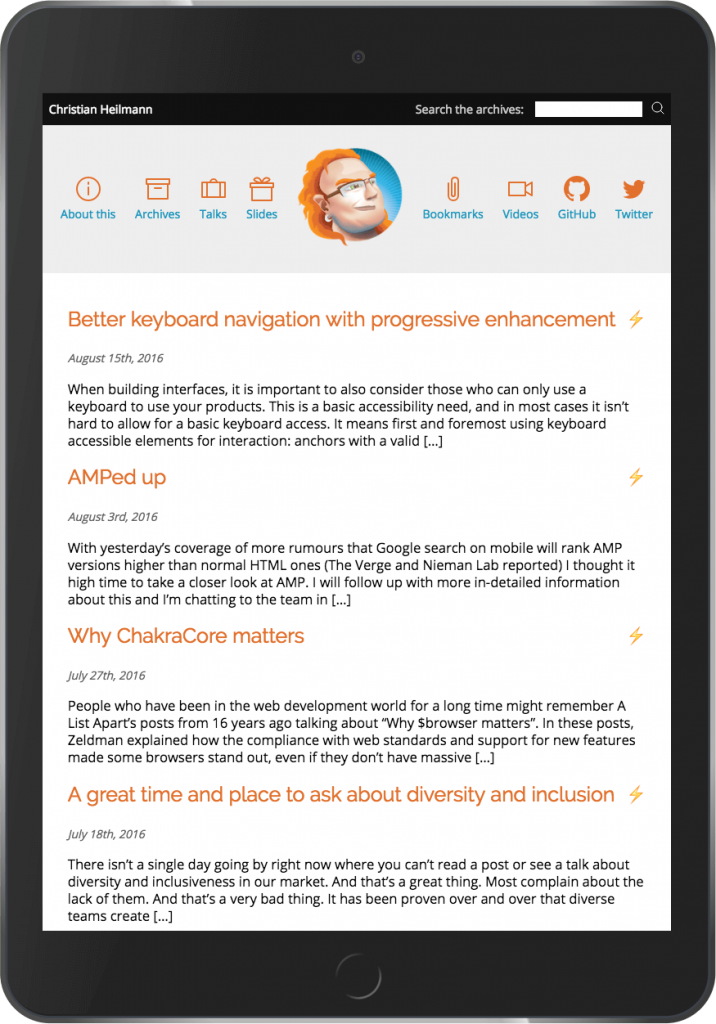
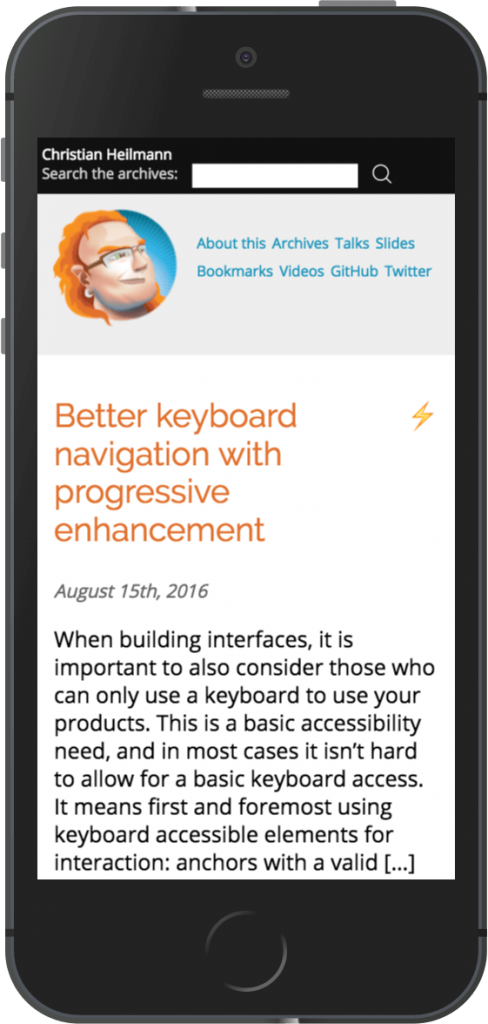
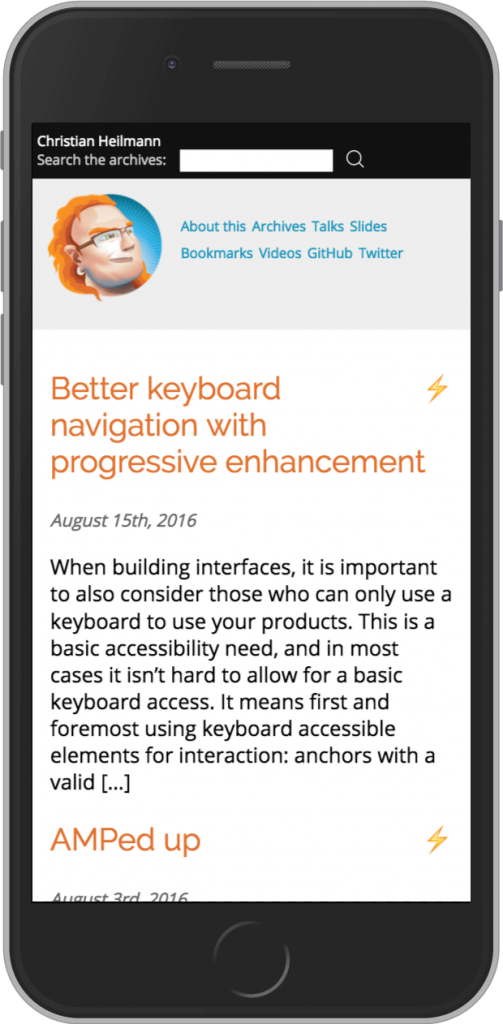
Here are few views of the blog on different devices (courtesy of the Chrome Devtools):

iPad:
Blog on iPad

iPhone 5:
Blog on iPhone 5

iPhone 6:
Blog on iPhone 6

Nexus 5:
Blog on Nexus 5

Hope you like it.

All in all I love working on the web these days. Our CSS toys are incredibly powerful, browsers are much more reliable and the insights you get and tweaks you can do in developer tools are amazing. When I think back when I did the first layout here in 2006, I probably wouldn’t go through these pains nowadays. Create some good stuff, just do as much as is needed.

Better keyboard navigation with progressive enhancement

Monday, August 15th, 2016
Keyboard

When building interfaces, it is important to also consider those who can only use a keyboard to use your products. This is a basic accessibility need, and in most cases it isn’t hard to allow for a basic keyboard access. It means first and foremost using keyboard accessible elements for interaction:

  • anchors with a valid href attribute if you want the user to go somewhere
  • buttons when you want to execute your own code and stay in the document

You can make almost everything keyboard accessible using the roving tab index technique, but why bother when there are HTML elements that can do the same?

Making it visual

Using the right elements isn’t quite enough though; you also need to make it obvious where a keyboard user is in a collection of elements. Browsers do this by putting an outline around active elements. Whilst dead useful this has always been a thorn in the side of people who want to control the whole visual display of any interaction. You can remove this visual aid by setting the CSS outline property to none, which is a big accessibility issue unless you also provide an alternative.

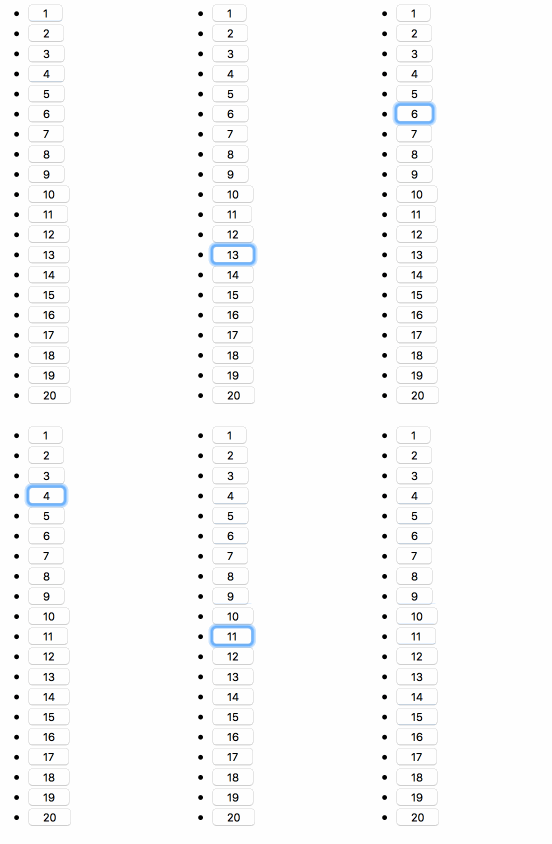
By using the most obvious HTML elements for the job and some CSS to ensure that not only hover but also focus states are defined we can make it easy for our users to navigate a list of items by tabbing through them. Shift-Tab allows you to go backwards. You can try it here and the HTML is pretty straight forward.

<ul>
  <li><button>1</button></li>
  <li><button>2</button></li>
  <li><button>3</button></li><li><button>20</button></li>
</ul>

example how to tab through a list of buttons

Using a list gives our elements a hierarchy and a way to navigate with accessible technology that a normal browser doesn’t have. It also gives us a lot of HTML elements to apply styling to. With a few styles, we can turn this into a grid, using less vertical space and allowing for more content in a small space.

ul, li {
  margin: 0;
  padding: 0;
  list-style: none;
}
button {
  border: none;
  display: block;
  background: goldenrod;
  color: white;
  width: 90%;
  height: 30px;  
  margin: 5%;
  transform: scale(0.8);
  transition: 300ms;
}
button:hover, button:focus {
  transform: scale(1);
  outline: none;
  background: powderblue;
  color: #333;
}
 
li {
  float: left;
}
 
/* 
  grid magic by @heydonworks 
  https://codepen.io/heydon/pen/bcdrl
*/
 
li {
  width: calc(100% / 4);
}
li:nth-child(4n+1):nth-last-child(1) {
  width: 100%;
}
li:nth-child(4n+1):nth-last-child(1) ~ li {
  width: 100%;
}
li:nth-child(4n+1):nth-last-child(2) {
  width: 50%;
}
li:nth-child(4n+1):nth-last-child(2) ~ li {
  width: 50%;
}
li:nth-child(4n+1):nth-last-child(3) {
  width: calc(100% / 4);
}
li:nth-child(4n+1):nth-last-child(3) ~ li {
  width: calc(100% / 4);
}

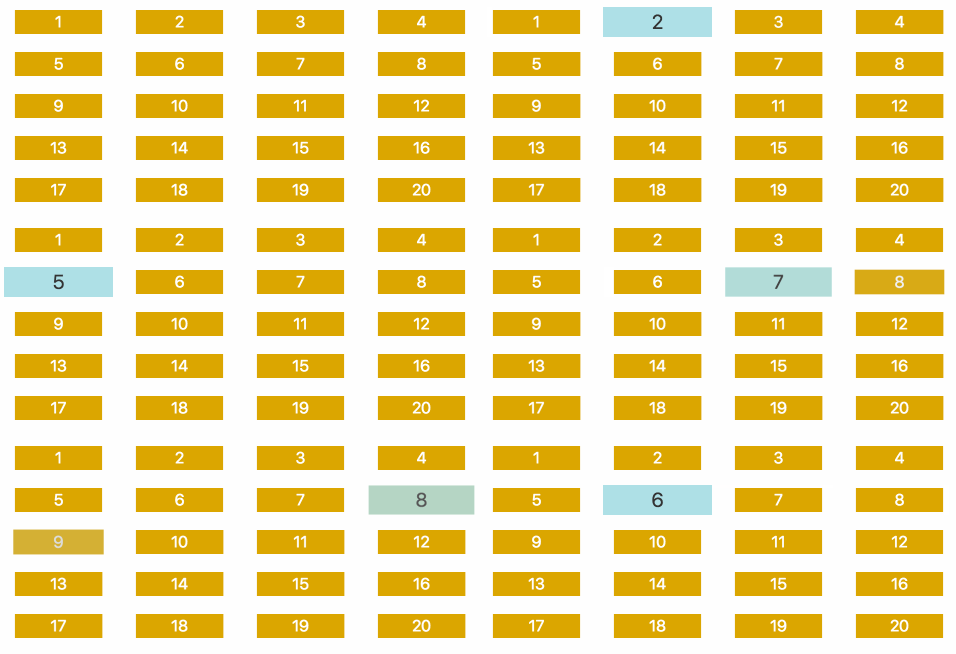
The result looks pretty fancy and it is very obvious where we are in our journey through the list.

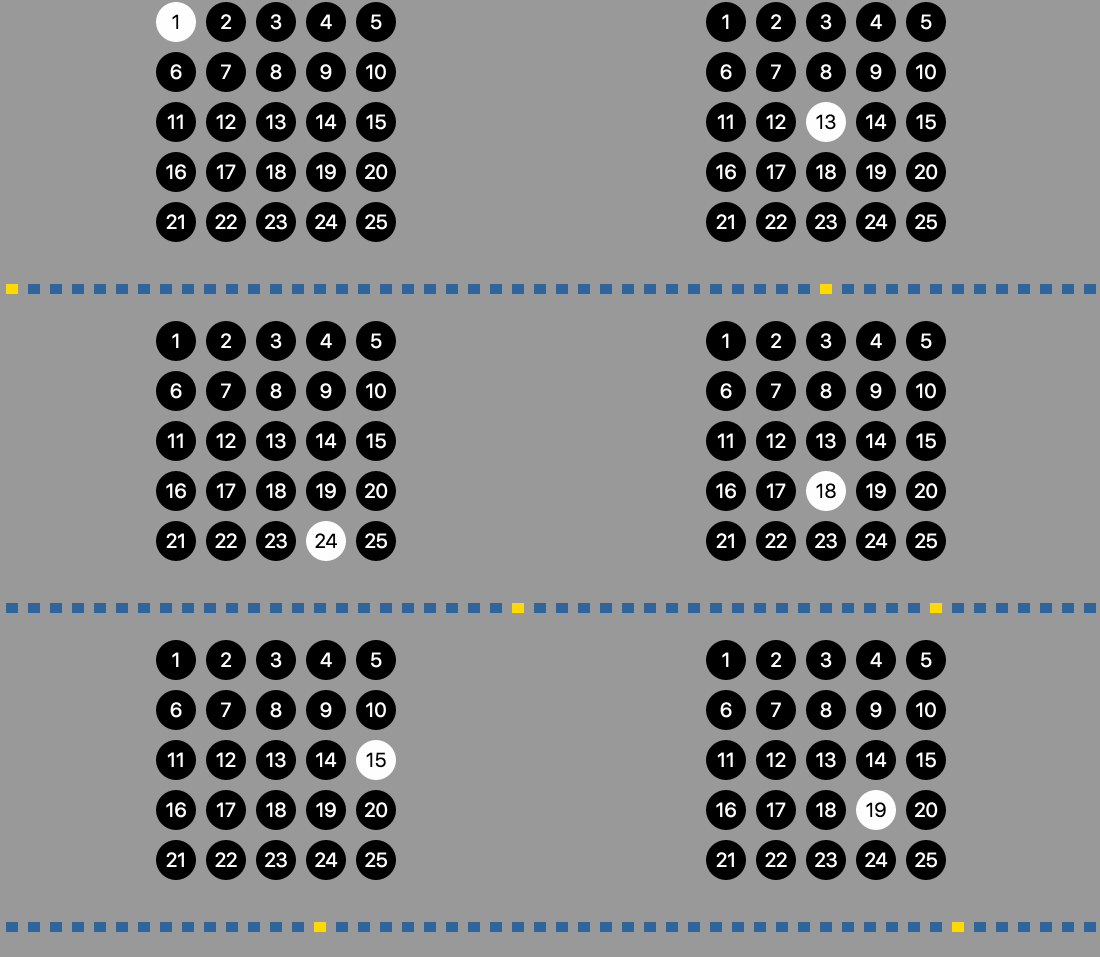
tabbing through a grid item by item

Enhancing the keyboard access – providing shortcuts

However, if I am in a grid, wouldn’t it be better if I could move in two directions with my keyboard?

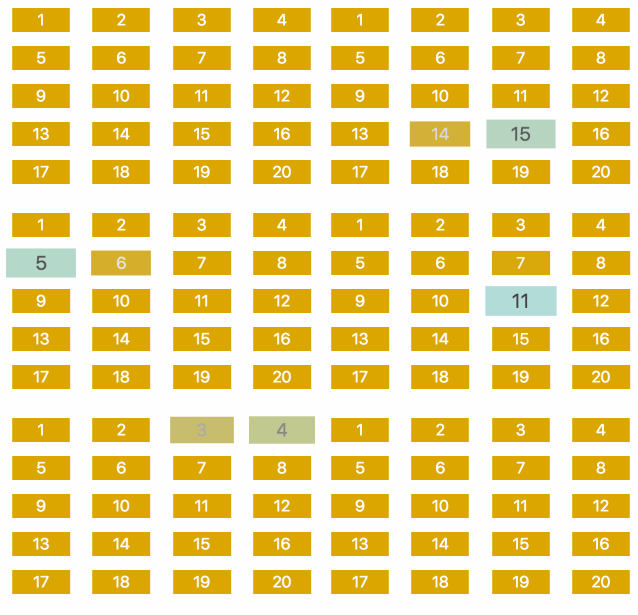
Using a bit of JavaScript for progressive enhancement, we get this effect and can navigate the grid either with the cursor keys or by using WASD:

navigating inside a grid of elements using the cursor keys going up, down, left and right

It is important to remember here that this is an enhancement. Our list is still fully accessible by tabbing and should JavaScript fail for any of the dozens of reasons it can, we lost a bit of convenience instead of having no interface at all.

I’ve packaged this up in a small open source, vanilla, dependency free JavaScript called gridnav and you can get it on GitHub. All you need to do is to call the script and give it a selector to reach your list of elements.

<ul id="links" data-amount="5" data-element="a">
  <li><a href="#">1</a></li>
  <li><a href="#">2</a></li><li><a href="#">25</a></li>
</ul>
 
<script src="gridnav.js"></script>
<script>
  var linklist = new Gridnav('#links');
</script>

You define the amount of elements in each row and the keyboard accessible element as data attributes on the list element. These are optional, but make the script faster and less error prone. There’s an extensive README explaining how to use the script.

How does it work?

When I started to ponder how to do this, I started like any developer does: trying to tackle the most complex way. I thought I needed to navigate the DOM a lot using parent nodes and siblings with lots of comparing of positioning and using getBoundingClientRect.

Then I took a step back and realised that it doesn’t matter how we display the list. In the end, it is just a list and we need to navigate this one. And we don’t even need to navigate the DOM, as all we do is go from one element in a collection of buttons or anchors to another. All we need to do is to:

  1. Find the element we are on (event.target gives us that).
  2. Get the key that was pressed
  3. Depending on the key move to the next, previous, or skip a few elements to get to the next row

Like this (you can try it out here):

moving in the grid is the same as moving along an axis

The amount of elements we need to skip is defined by the amount of elements in a row. Going up is going n elements backwards and going down is n elements forwards in the collection.

diagram of navigation in the grid

The full code is pretty short if you use some tricks:

(function(){
  var list = document.querySelector('ul');
  var items = list.querySelectorAll('button');
  var amount = Math.floor(
        list.offsetWidth / 
        list.firstElementChild.offsetWidth
      );
  var codes = {
    38: -amount,
    40: amount, 
    39: 1,
    37: -1
  };
  for (var i = 0; i < items.length; i++) {
    items[i].index = i;
  }
  function handlekeys(ev) {
    var keycode = ev.keyCode;
    if (codes[keycode]) {
      var t = ev.target;
      if (t.index !== undefined) {
        if (items[t.index + codes[keycode]]) {
          items[t.index + codes[keycode]].focus();
        }
      }
    }
  }
  list.addEventListener('keyup', handlekeys);
})();

What’s going on here?

We get a handle to the list and cache all the keyboard accessible elements to navigate through

  var list = document.querySelector('ul');
  var items = list.querySelectorAll('button');

We calculate the amount of elements to skip when going up and down by dividing the width of the list element by the width of the first child element that is an HTML element (in this case this will be the LI)

  var amount = Math.floor(
        list.offsetWidth / 
        list.firstElementChild.offsetWidth
      );

Instead of creating a switch statement or lots of if statements for keyboard handling, I prefer to define a lookup table. In this case, it is called codes. They key code for up is 38, 40 is down, 39 is right and 37 is left. If we now get codes[37] for example, we get -1, which is the amount of elements to move in the list

  var codes = {
    38: -amount,
    40: amount, 
    39: 1,
    37: -1
  };

We can use event.target to get which button was pressed in the list, but we don’t know where in the list it is. To avoid having to loop through the list on each keystroke, it makes more sense to loop through all the buttons once and store their index in the list in an index property on the button itself.

  for (var i = 0; i < items.length; i++) {
    items[i].index = i;
  }

The handlekeys() function does the rest. We read the code of the key pressed and compare it with the codes lookup table. This also means we only react to arrow keys in our function. We then get the current element the key was pressed on and check if it has an index property. If it has one, we check if an element exist in the collection that is in the direction we want to move. We do this by adding the index of the current element to the value returned from the lookup table. If the element exists, we focus on it.

  function handlekeys(ev) {
    var keycode = ev.keyCode;
    if (codes[keycode]) {
      var t = ev.target;
      if (t.index !== undefined) {
        if (items[t.index + codes[keycode]]) {
          items[t.index + codes[keycode]].focus();
        }
      }
    }
  }

We apply a keyup event listener to the list and we’re done :)

  list.addEventListener('keyup', handlekeys);

If you feel like following this along live, here’s a quick video tutorial of me explaining all the bits and bobs.

The video has a small bug in the final code as I am not comparing the count property to undefined, which means the keyboard functionality doesn’t work on the first item (as 0 is falsy).

AMPed up

Wednesday, August 3rd, 2016

With yesterday’s coverage of more rumours that Google search on mobile will rank AMP versions higher than normal HTML ones (The Verge and Nieman Lab reported) I thought it high time to take a closer look at AMP.

I will follow up with more in-detailed information about this and I’m chatting to the team in Google about the project, but here is the simple news: this blog is now also AMP enabled and you can get the AMP version of any post by adding a “/amp” to the URL.

The great thing about this? I had nothing else to do but to use the WordPress plugin (the source of which is also available on GitHub).

With AMP being an alternative representation of HTML content and a subset of it, this was easy enough. And frankly, I like the way it looks even on Desktop :).