Christian Heilmann

You are currently browsing the Christian Heilmann blog archives for June, 2020.

Archive for June, 2020

How good IDEs help you do the right thing

Tuesday, June 30th, 2020

As someone who has been doing this web development thing for a long time I am amazed how cool our tooling is by now. The best development environments don’t only make it easy for you to develop. They also guide you to do things right.

Take this simple example of adding an image to an HTML document. In order for this to be an excellent experience for the end user the image should be:

  • Available
  • Have defined dimensions in the HTML to avoid reflow and the page layout jumping around once it loads
  • Have an alternative text that explains assistive technology, search engines and users who couldn’t load the image what it is about.

The syntax is pretty straight forward. You need the IMG tag, with an alt attribute and a width and height attribute. And yet this simple bit of HTML keeps getting done wrong.

Enter Visual Studio Code with its in-built Emmet engine and the Webhint plugin.

You type ‘img’ and you get a few options:

Emmet showing a few of its autocomplete options for images creating attributes like src, alt, sizes, and srcset for you

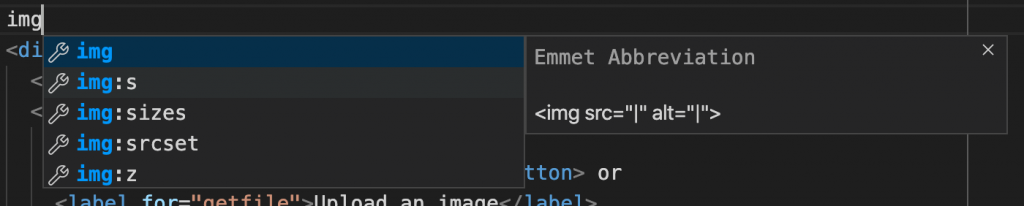
Selecting any of them (the first one is automatically selected) and hitting tab will write the rest of the tag for you and position the cursor.

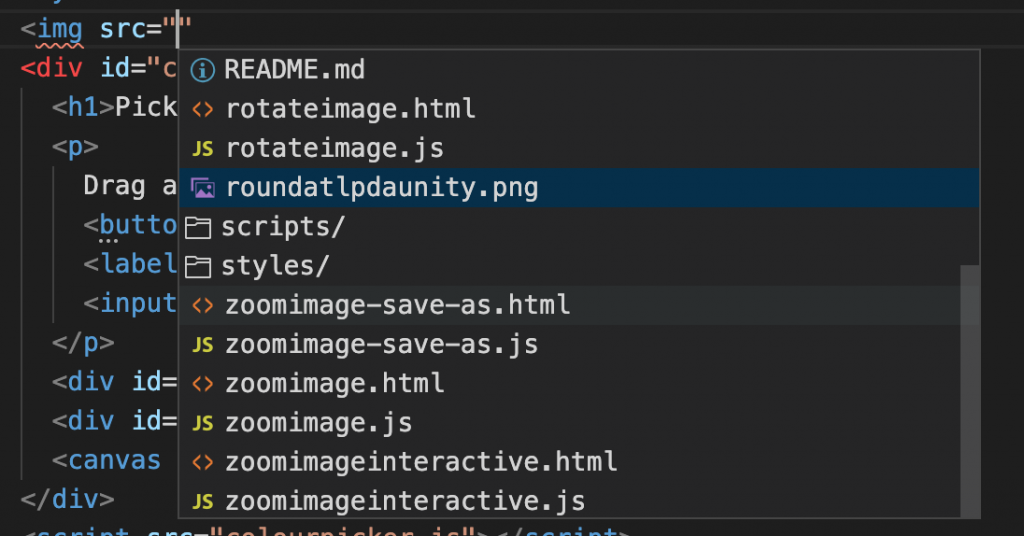
But there is even more goodness in there. If you type <​img src=” VSCode autocomplete will show you all the files in the current folder. You can select the one you want to include by starting to type its name or use the cursor keys.

Img tag with all the files in the current folder to choose from as the src value

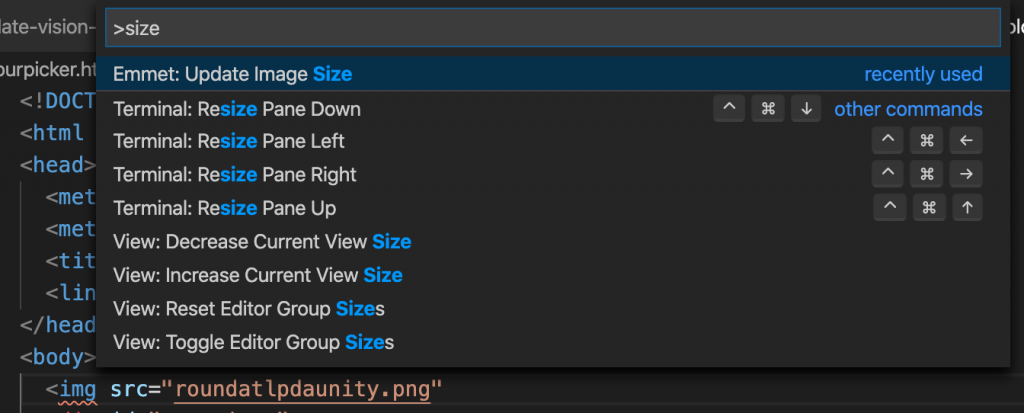
Once you have one, close the image tag with “>”. Then use CMD/Ctrl+Shift+P to open the command console and type “size” to get the emmet size options. Select “Emmet:update image size” to add the image dimensions as width and height attributes.

Visual Studio Command Palette showing the options for 'size'

Img with the correct values and width and height attributes

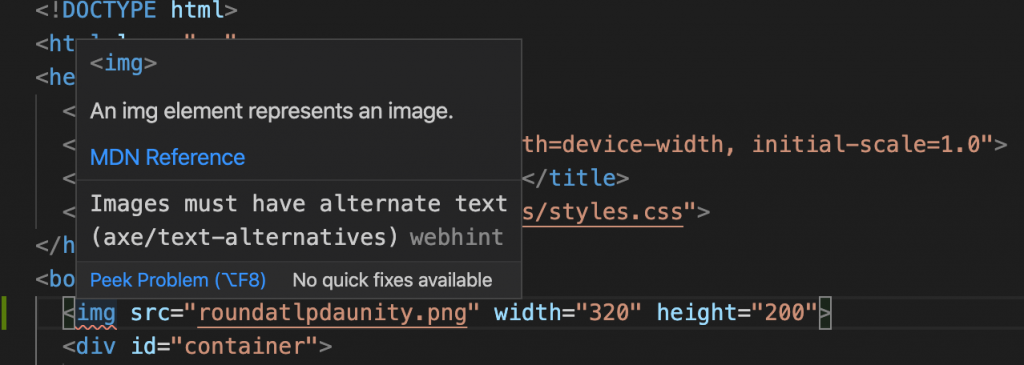
There’s still a red squiggly line under the img tag. This is Webhint complaining that something is wrong. Hovering over the element shows you what’s wrong. We are still missing an alt attribute with an alternative text.

Webhint complaining rightfully that every image needs an alt attribute

Here is the whole thing as a GIF animation:

Animation of the process of adding an image with width and height into VS Code

It has never been easier to do the right thing. Not only do we have code completion, but we also have explanations why something is wrong and how to fix it. And this – to me – is much better than any “best practice” documentation. We learn how to do the right thing by coding, not by reading and then coding.

Testing your animations for “prefers-reduced-motion” support

Friday, June 26th, 2020

Motion turned off in MacOS

Animations and transitions are things that can make a product feel much more natural and welcoming. They can also be a great way to make slow processes feel faster. But not everybody is OK with seeing animations and they can overwhelm people or – when done wrongly – even cause nausea and seizures.

That’s why operating systems allow users to turn off animation and your web animations should comply with that decision.

Checking for animation support with ‘prefers-reduced-motion’

Luckily, this is not tough to do, as you have a CSS media query that fires when a user chose to turn off animations. In order to make your animations play nicely with that setting you can un-do any animation inside this media query.

You can see this example in this codepen.


See the Pen
Considerate animation using prefers-reduced-motion
by Christian Heilmann (@codepo8)
on CodePen.


.turtle {
  font-size: 50px;
  animation: move 1s infinite linear alternate;
}
@keyframes move {
  to { transform: translate(200px, 0);}
}
@media (prefers-reduced-motion: reduce) {
  .turtle { animation: none; }
}

Alternatively, you can also wrap any animation inside the positive media query:

.turtle { font-size: 50px; }
 
@media (prefers-reduced-motion: no-preference) {
  .turtle {
    animation: move 1s infinite linear alternate;
  }
  @keyframes move {
    to { transform: translate(200px, 0);}
  }
}

You can even use it in a link element to avoid any CSS related to animations to be loaded:

<link rel="stylesheet" href="animations.css"
      media="(prefers-reduced-motion: no-preference)">

For JavaScript animations, you can use matchMedia to test if animations are wanted.

const wantsanimation = window.matchMedia('(prefers-reduced-motion: reduce)');
wantsanimation.addEventListener('change', () => {
  console.log(mediaQuery.media, mediaQuery.matches);
  // Stop JavaScript based animations.
});

How to test your animations using developer tools

Testing your animations for compliance with your users’ settings can be annoying as you need to turn the setting on and off in your Operating System. There is, however, an easier way to do it, using Chromium developer tools.

As described in the Edge Developer Tools documentation, you can simulate the support for animations

You can see this in action in this video :

The steps are described in the documentation . You either use keyboard shortcuts CMD/CTRL+Shift+i to open devtools, CMD/CTRL+Shift+P to open the Command Menu and type “reduce” followed by enter to toggle the setting. Or you can use the menu, select the … menu up top and navigate to “More Tools” -> “Rendering” where you scroll down to the “Emulate CSS media feature prefers-reduced-motion” to toggle the setting.

If that is too complex, I’d love to hear where you’d expect this functionality to live in the developer tools! Reach out to me via Twitter at codepo8 or directly to EdgeDevTools.

Further reading

Talking about the fun I have with HTML canvas at “Programmed in Pencil” – Video, Slides and code examples

Thursday, June 25th, 2020

Yesterday I presented Images, pixels, canvas, tigers and bears… at an online meetup called Programmed in Pencil run by RVU.

I have to admit I misread the title of the event and thought it would be predominantly about creative coding, which is why I wrote this talk and not one about software planning or running teams. But there is an upside: I love working with canvas and showing people how you can use it to turn an image into something you can manipulate, convert and change with plain JavaScript.

The recording of the Zoom meeting is available on YouTube :

The slides are on noti.st :

View Images, pixels, canvas, tigers and bears… on Notist.

And as I had some time today I put together all the code examples I showed, documented them heavily and put them on GitHub. Click the image below to go and play.

demo page of how to count the colours in an image

You can get the source of all of them or play with the interactive version (that also shows the source inline).