Christian Heilmann

You are currently browsing the Christian Heilmann blog archives for June, 2022.

Archive for June, 2022

Taking screenshots of streaming video services using Browser Developer Tools

Tuesday, June 28th, 2022

One of the more overly strict features of video players in modern operating systems is that you can not use screen recording or screenshot tools to record content from streaming video platforms like Netflix or Disney+. Whilst I understand the need for DRM and preventing recording a streaming program, taking screenshots is a different matter. Often pointing out goofs in programs with a screenshot makes for good viral web content and people aren’t really likely to stitch a silent movie together from screenshots. Although I am sure some have tried.

Now, if you want to take a screenshot of a streaming service video, you can do that using the developer tools built into the browser.

Screenshot using the Elements tool and the node context menu.

In order to take a screenshot of a video, you can do this:

  • Pause the video and wait for the controls to vanish.
  • Open the Developer Tools (using F12).
  • Go to the Elements tool , active the Inspector and pick the video (it shows a coloured overlay).
  • Activate the context menu on the … of the highlighted node in the Elements tool and pick “capture node screenshot”

Context menu item on Element nodes 'Capture Node Screenshot'

And that’s it. Here’s how that looks as a screencast:
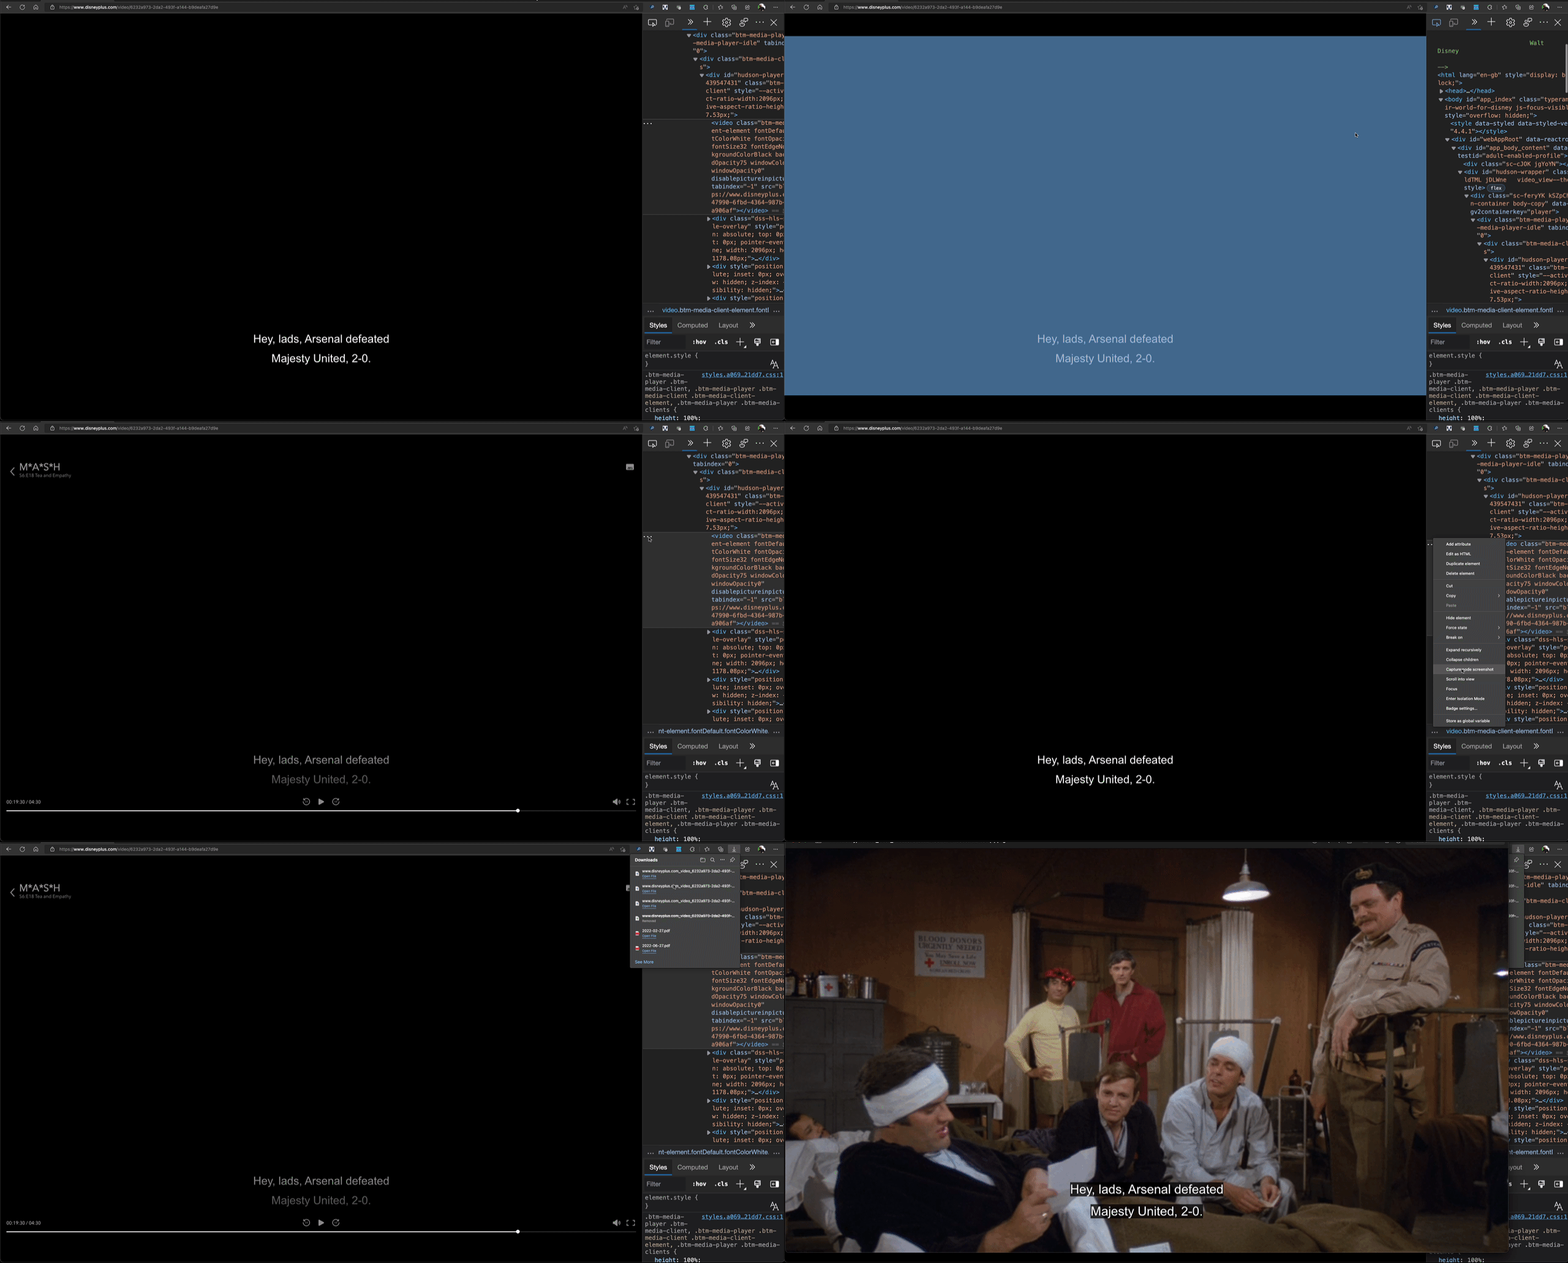
Taking a screenshot of a video using the Elements tool

Screenshot using Device Emulation

Alternatively, you can also use the Device Emulation Tool .

  • Pause the video and wait for the controls to vanish.
  • Open the Developer Tools (using F12).
  • Activate Device emulation
  • Activate the … menu and select “Capture Screenshot”

Capture screenshot item in the Device emulation

You can see this in action in the following screencast.

Taking a screenshot using the device emulation

The main difference to the other way is that this will take a screenshot with black borders around it.

But there is the browser extension “Superscreenshotwowtotallylegit” that does the same!

Now, I know that there are probably dozens of browser extensions that do the same thing, but I just don’t trust extensions that offer a “way around limitations of service X” as they are likely to be a front for malicious code or ad supported themselves. Why install something when your browser already has everything you need?

One line of CSS to add basic dark/light mode

Monday, June 20th, 2022

When you have your OS set up in dark mode seeing bright form elements is grating. By starting your style sheet with a single line of CSS, you can make sure that people using dark mode get dark form elements and backgrounds and those using light mode, light ones.

Codepen showing the difference the line of CSS makes - offering the page in a dark and light mode

You can see it in this codepen


See the Pen
color-scheme
by Christian Heilmann (@codepo8)
on CodePen.


You can also use the browser developer tools to simulate the different modes to see the difference.

Emulating different modes in browser developer tools

Read more about color-scheme on the MDN web docs.

GitHub Copilot explaining code and translating it from one language to another

Tuesday, June 7th, 2022

GitHub Copilot is already the dog’s bollocks, but I just installed the GitHub Labs extension and my jaw is still open.

Code explanation

This one allows you to highlight a piece of code and get explanations of what it does:

Screencast showing the explanation feature in action

For example:

async function downloadZipFile(downloadUrl) {
  await fs.remove('out/edge');
 
  const file = fs.createWriteStream('edge.zip');
  https.get(downloadUrl, function(response) {
    response.pipe(file);
    response.on('end', async ()=>{
      await fs.createReadStream('edge.zip').pipe(unzipper.Extract({path: 'out/edge/'}));
      await fs.unlink('edge.zip', () => {} );
      const outdir = path.join(__dirname, 'out', 'edge');
      console.log(`Edge files extracted to: ${outdir}`);
    });
  });
}

Turns into:

  1. We first delete the ‘out/edge’ folder.
  2. We downoad the Edge.zip file from the GitHub release page.
  3. We unzip the Edge zip file to the ‘out/edge’ folder.
  4. We print a message to the console.

Code translation

You can also highlight a piece of code and it gets translated to another language. For example, JavaScript to PHP.

Screencast of GitHub Copilot translating JavaScript to PHP

I am so looking forward to where this is all going!